Brand2Social is built around three core concepts — Organizations, Brands, and Users — that together give you a flexible, scalable structure for managing social media across teams, clients, and platforms. Understanding how these three layers relate to each other will help you get the most out of the platform.
Organizations
What is an Organization?
An Organization is the top-level entity in Brand2Social. Think of it as the parent company that owns and oversees all the Brands operating beneath it. This structure is particularly useful for agencies, enterprises, or any business managing multiple distinct clients or business units from a single account.
When you first sign up for Brand2Social, an Organization is automatically created for you and you are assigned as its Organization Admin, giving you full control over everything within it.
Where to Find Your Organization Settings
1. Click on the Profile icon in the top-right corner of the screen.
2. Click Settings in the pop-up window.
3. Navigate to Manage Organizations in the left-side navigation bar.
4. Here you can view and update your organization’s profile picture, name, and description.
Benefits of Organizations
- Centralized Management — oversee and control all your Brands and their social media strategies from a single interface, without switching accounts.
- Streamlined User Roles and Permissions — manage user access at the Organization level so team members have the right permissions across all associated Brands.
- Efficient Collaboration — team members can work across multiple Brands within the same Organization, improving coordination and communication.
Brands
What is a Brand?
A Brand in Brand2Social is an individual social media presence or client entity that you manage. Each Brand has its own set of connected social media accounts (across platforms like Facebook, Instagram, LinkedIn, Twitter, and more), its own content calendar, and its own team members and permissions.
This separation allows you to maintain distinct social media strategies, content plans, and performance tracking for each Brand — keeping everything clean and organized even when managing many clients at once.
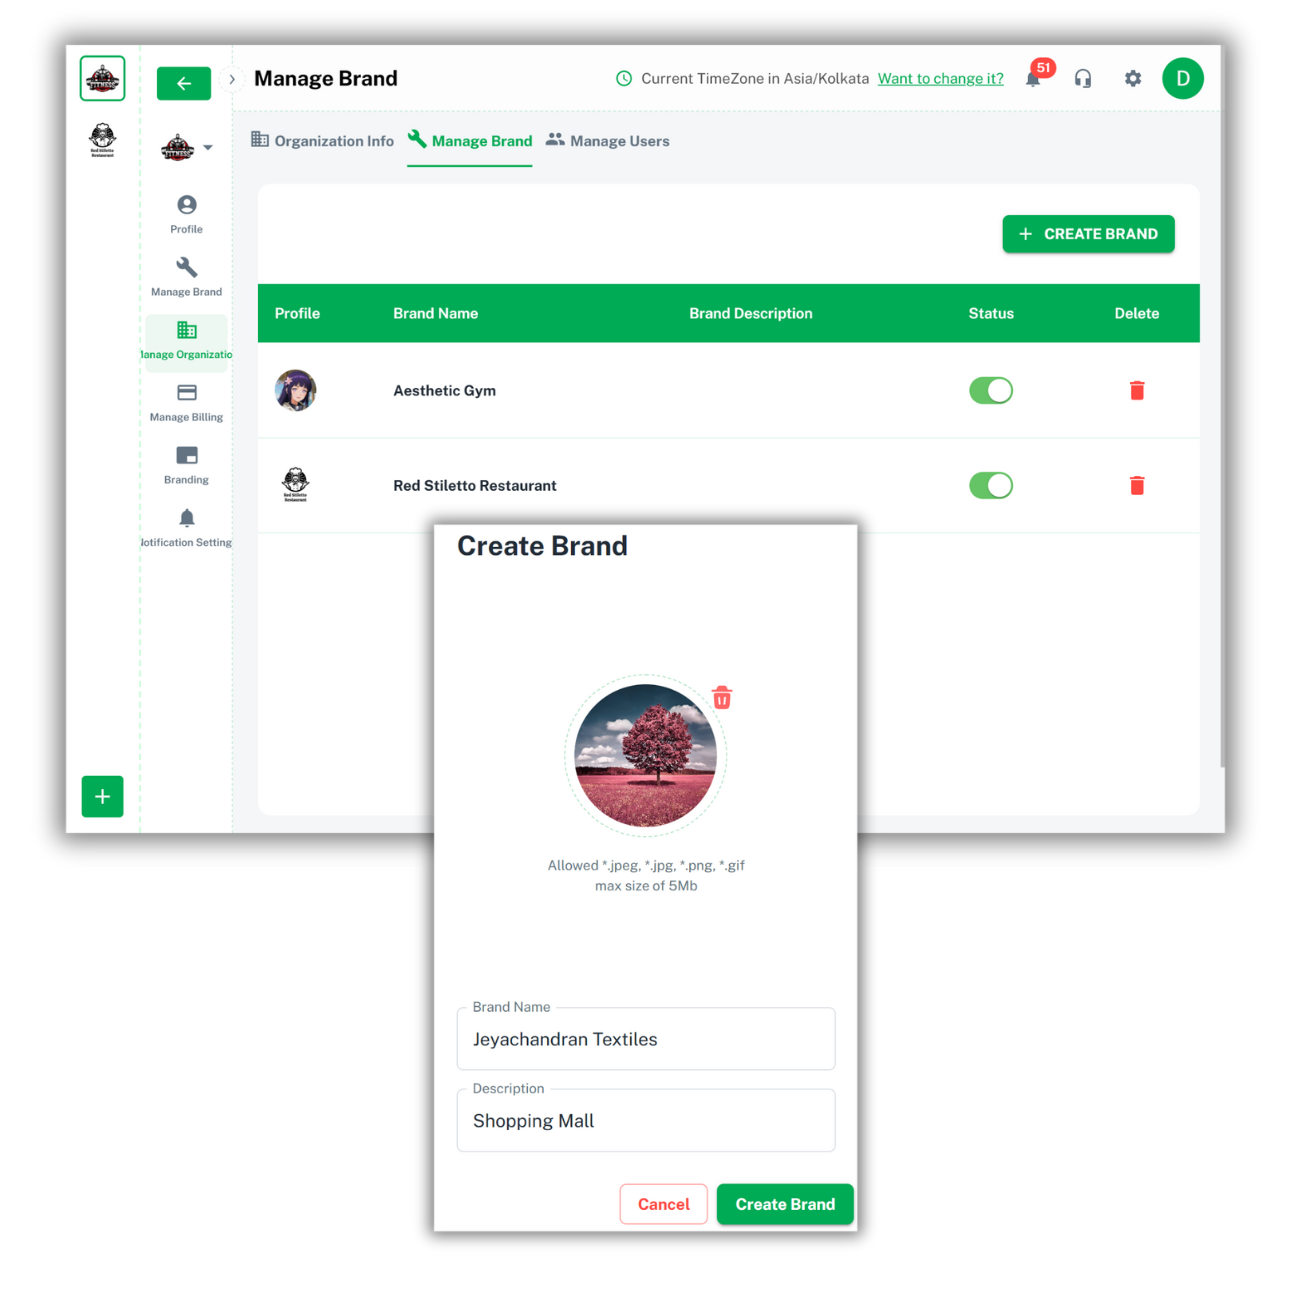
Creating a New Brand
1. Click the + (plus) icon at the bottom-left of the screen.
2. Add a profile picture, name, and description for the new Brand.
3. Click Save to create the Brand.
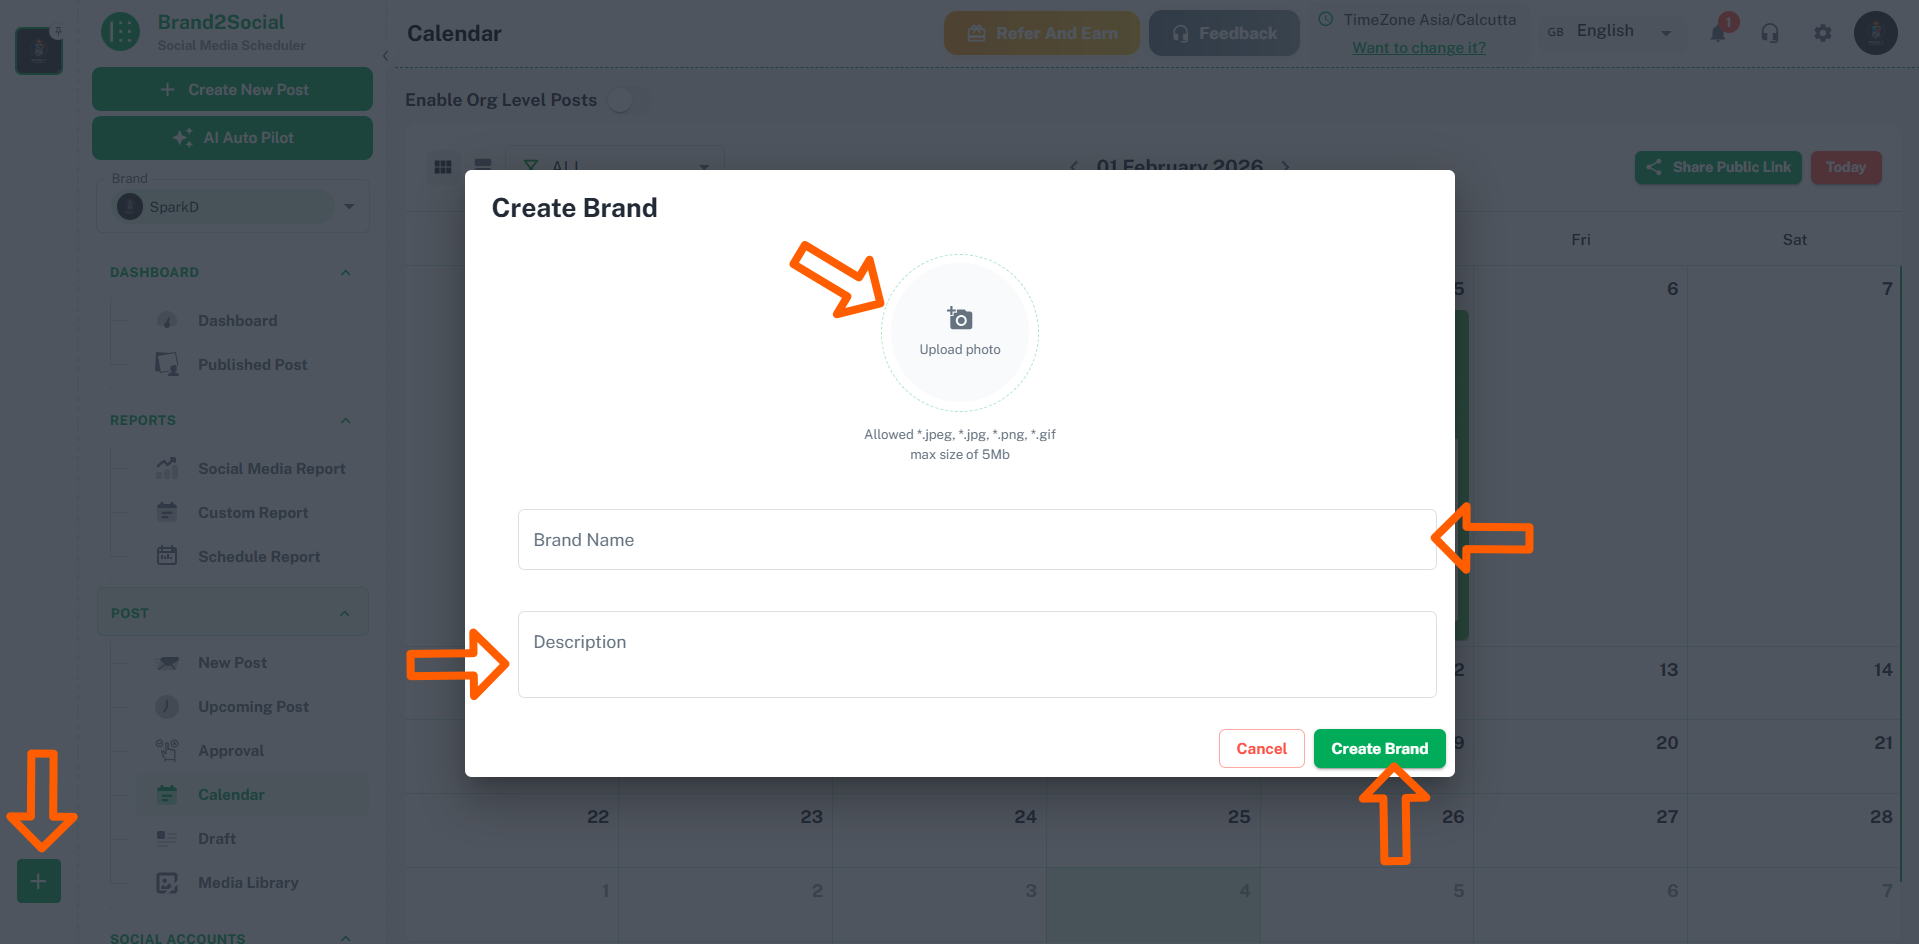
Once created, the new Brand will appear in the left-side panel alongside your existing Brands.
Switching Between Brands
1. All Brands within your Organization are listed on the left side of the screen, each shown with its profile picture.
2. Click on the Brand you want to work in — the interface will immediately switch to that Brand’s workspace.
ℹ️ Note: Each Brand is a fully separate workspace. Content, connected accounts, and team members do not carry over between Brands unless explicitly configured.
Benefits of Brands
- Focused Social Media Strategy — tailor your content strategy, tone, and posting schedule to the specific needs and audience of each Brand independently.
- Clear Segregation — keep content, accounts, and analytics completely separate across different clients or business units, preventing cross-contamination.
- Customizable Permissions — assign different roles to team members within each Brand, so only authorized users can create, edit, or publish content for that Brand.
Users
What is a User?
A User in Brand2Social is any individual who has been given access to the platform. Users are assigned roles that determine what they can see and do — from creating and scheduling posts, to reviewing and approving content, to managing integrations and team settings.
Common user roles include:
- Organization Admin — full control over the Organization, all Brands, and all Users.
- Brand Admin — full control within a specific Brand.
- Editor — can create, edit, and schedule posts within assigned Brands.
- Approver — can review and approve posts before they are published.
How to Invite a New User
1. Click on your profile photo in the top-right corner to access Settings.
2. Navigate to Manage Brand in the left-side menu.
3. Select Manage Users from the options at the top.
4. Click Add Team Member.
5. Enter the new user’s name and email address.
6. Assign a role for the user (e.g., Admin, Editor, Approver).
7. Click Invite User — the user will receive an email invitation to join your Organization.
ℹ️ Note: Invited users will only have access to the Brands and permissions assigned to their role. You can update a user’s role or remove them at any time from the Manage Users page.
Troubleshooting Common Issues
I cannot see a Brand in my left-side panel
- Confirm you are logged in to the correct Organization. If you are part of multiple Organizations, check that the right one is active.
- Contact your Organization Admin to verify you have been assigned access to the Brand in question.
An invited user has not received their invitation email
- Ask them to check their spam or junk folder.
- If the email is not there, go to Manage Users, find the user, and resend the invitation.
I want to remove a user’s access to a specific Brand
- Go to Settings → Manage Brand → Manage Users, find the user, and either change their role or remove them from that Brand entirely. This will not affect their access to other Brands within the Organization.


