Integrating your Facebook Pages with Brand2Social streamlines your social media management by allowing you to create, schedule, and publish posts directly from our platform. This integration enables seamless content sharing, centralized engagement, and performance tracking for all your Facebook Pages. With Brand2Social, you can efficiently handle multiple pages, ensuring consistent and engaging content across your entire Facebook presence.
Prerequisites
Before you begin, ensure the following requirements are met:
- You must be an owner or admin of the Facebook Page(s) you wish to connect.
- Only Facebook Pages are supported – personal profiles and groups cannot be integrated.
- If your Page is managed via Facebook Business Suite, ensure your Business Suite permissions are fully configured.
- You have valid login credentials for the Facebook account associated with those Pages.
- You are using a supported browser (latest versions of Chrome, Firefox, Safari, or Edge) with cookies and pop‑ups enabled.
⚠️ Important: If you are an admin through inheritance from a parent Page, you will not be able to connect the Page. See the Troubleshooting section for more details.
Step 1 — Navigate to the Integrations Page
1. Log in to your Brand2Social account.
2. In the left-hand navigation menu, click on Integrations (or navigate to Settings → Integrations).
3. You will see a list of all available social media platforms, each with a Connect button.

Step 2 — Connect Facebook
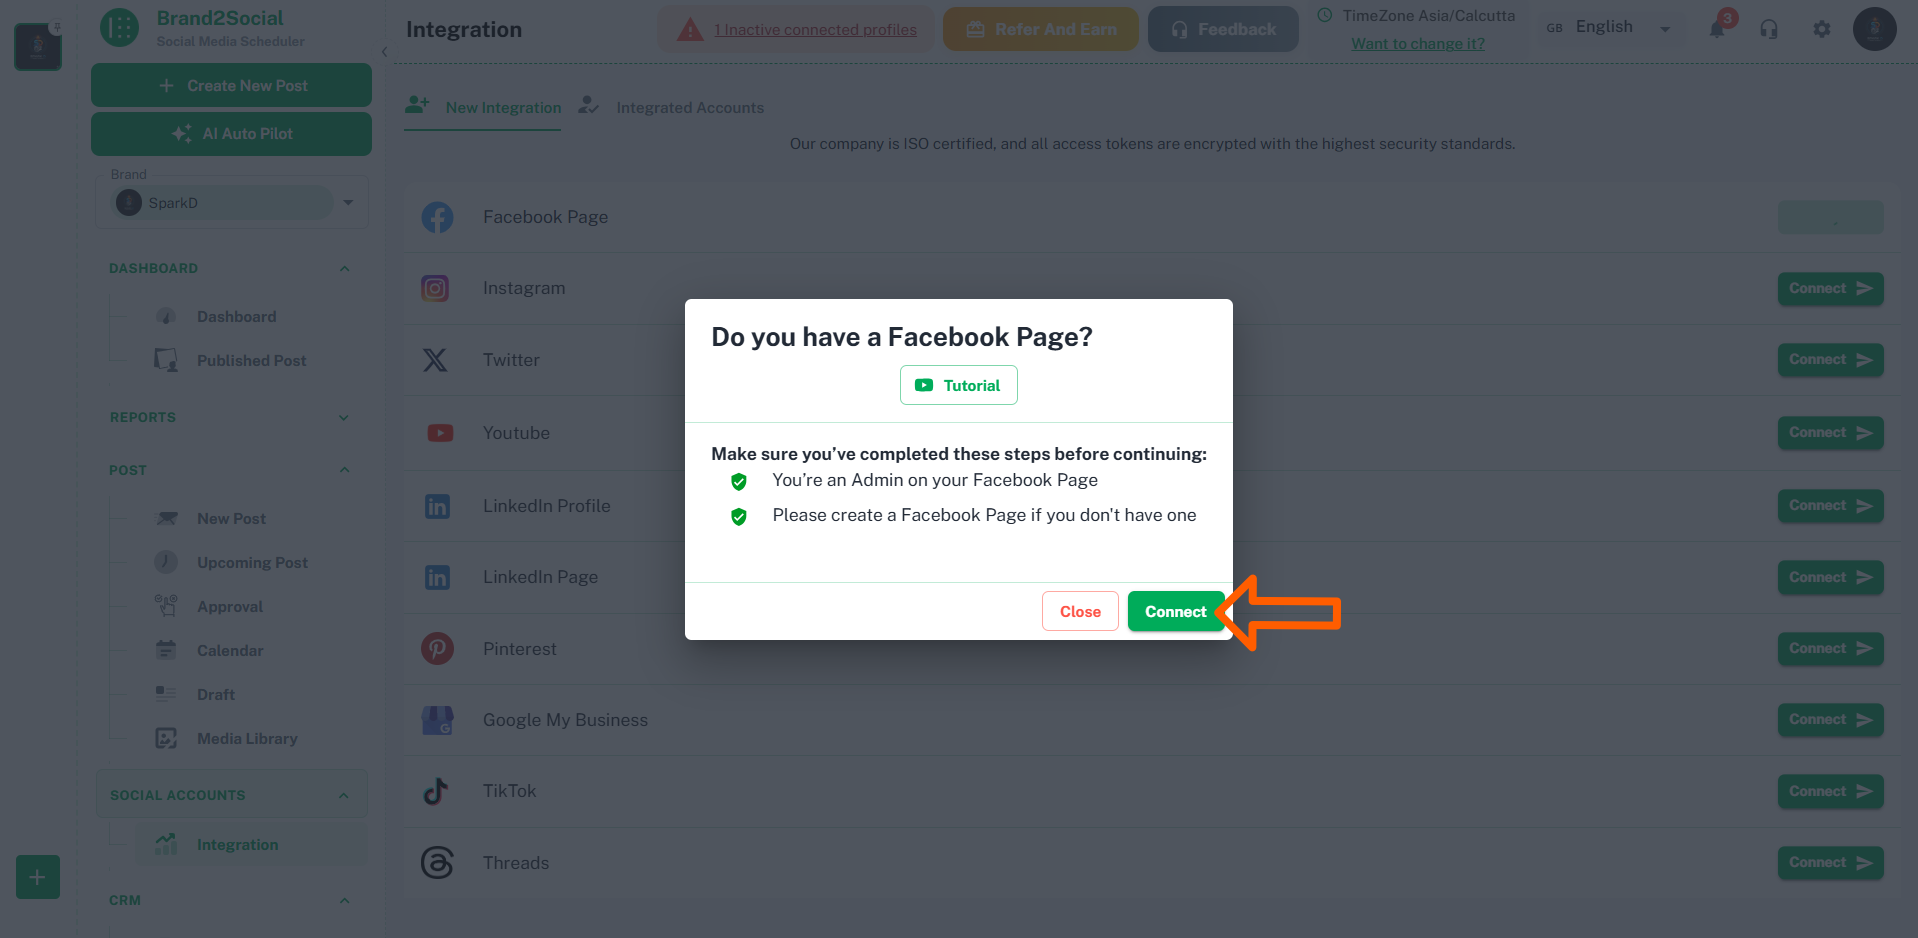
1. Locate Facebook in the list of platforms.
2. Click the Connect button next to Facebook.
ℹ️ Note: If Facebook is already connected and you want to add more Pages, click the three dots (⋮) next to the existing Facebook connection and select Reauthorize instead.
Step 3 — Read the Instructions
Before proceeding to Facebook’s login flow, Brand2Social will display a short instructions screen. Take a moment to read through it — it outlines the permissions that will be requested and what they are used for.
1. Review the instructions carefully.
2. Click Continue or Proceed when you are ready to move to the Facebook login step.
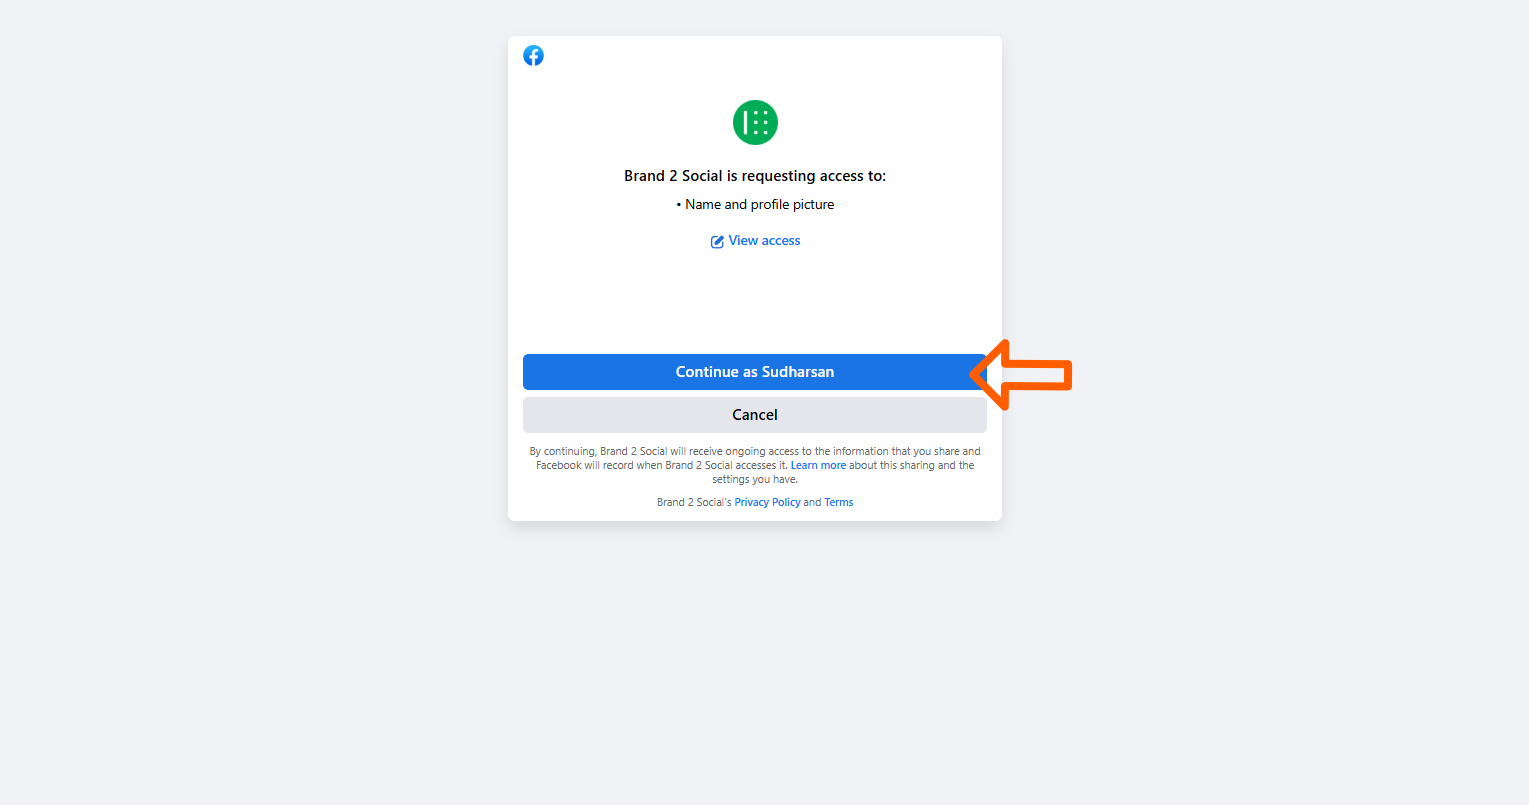
Step 4 — Log In to Facebook
A Facebook login window will open in a new tab or pop-up.
1. If you are already logged in to the correct Facebook account, Facebook may skip this step automatically.
2. If not, enter the email address and password associated with the Facebook account that manages your Pages.
3. Click Log In (or Submit if shown).
⚠️ Important: Make sure you log in with the Facebook account that has Admin access to the Pages you want to connect. Logging in with the wrong account will mean your Pages do not appear in the next step.
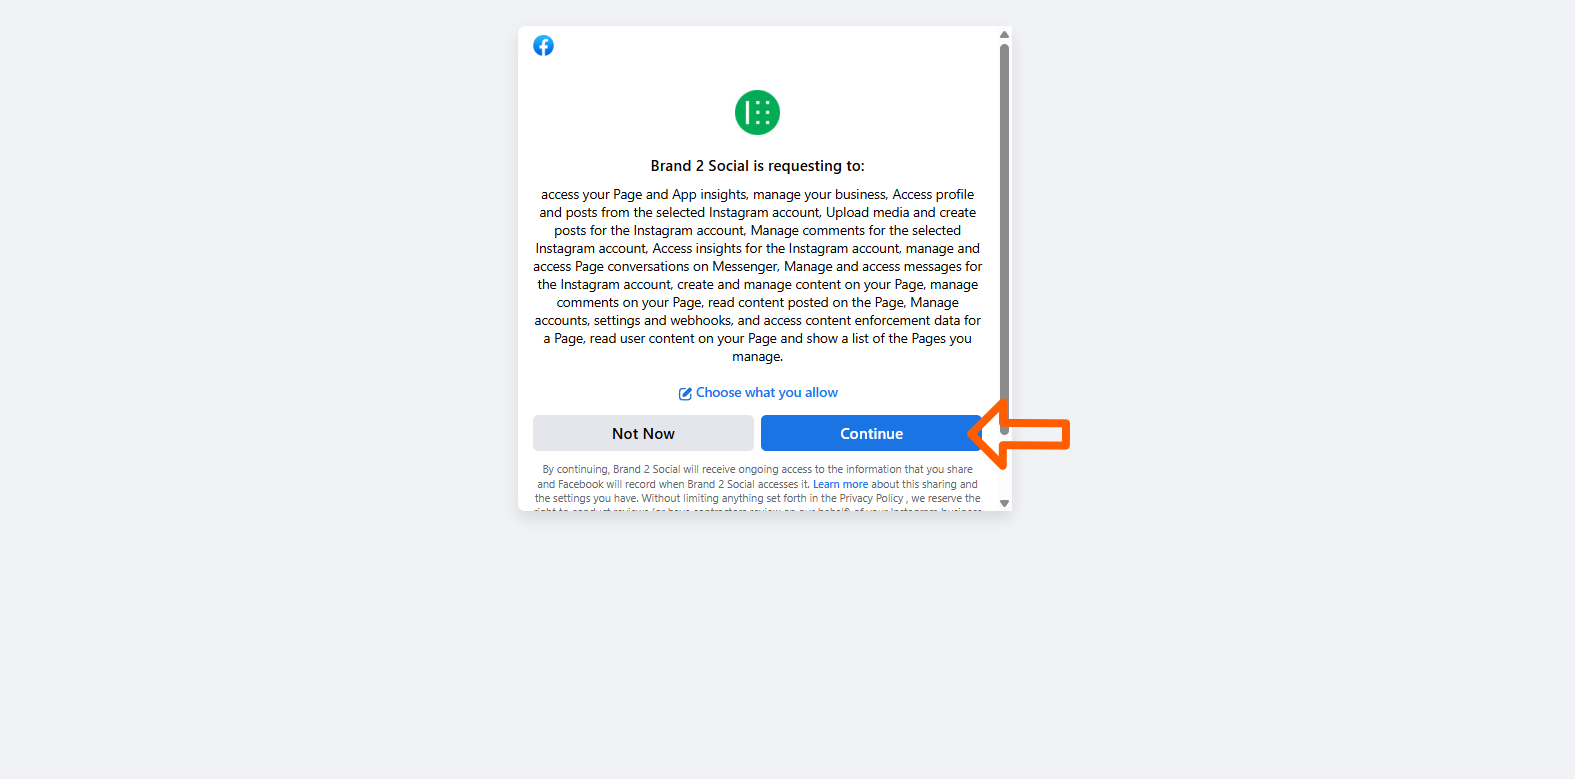
Step 5 — Review and Accept Permissions
For the first-time integration, Facebook will display a permissions screen listing what Brand2Social is requesting access to. These permissions are required for Brand2Social to create, schedule, and publish posts on your behalf.
1. Carefully review the list of permissions.
2. It is important to leave all permissions toggled on. Disabling any permission may limit Brand2Social’s ability to manage your Pages.
3. Click Continue to grant the permissions.
ℹ️ Note: If you have previously connected Facebook and are reauthorizing, this screen may look slightly different. You may see a summary of previously granted permissions rather than a fresh permissions request.
Common permissions Brand2Social requests and why:
| Permission | Purpose |
|---|---|
| Manage your Pages | Allows Brand2Social to publish posts and manage content on your behalf. |
| Read Page content | Enables Brand2Social to retrieve post history and analytics. |
| Create and manage ads | Required for any ad-related features (if applicable to your plan). |
| Access Page insights | Allows Brand2Social to pull engagement and reach metrics for reporting. |
Step 6 — Select Your Facebook Pages
After granting permissions, Facebook will show a list of all Pages your account manages.
1. Review the list and select the Facebook Pages you want to connect to Brand2Social by toggling them on.
2. If you manage many Pages, use the search bar (if available) to find specific ones.
3. Make sure every Page you want to manage via Brand2Social is selected before proceeding.
4. Click Continue or Done to confirm your selections.
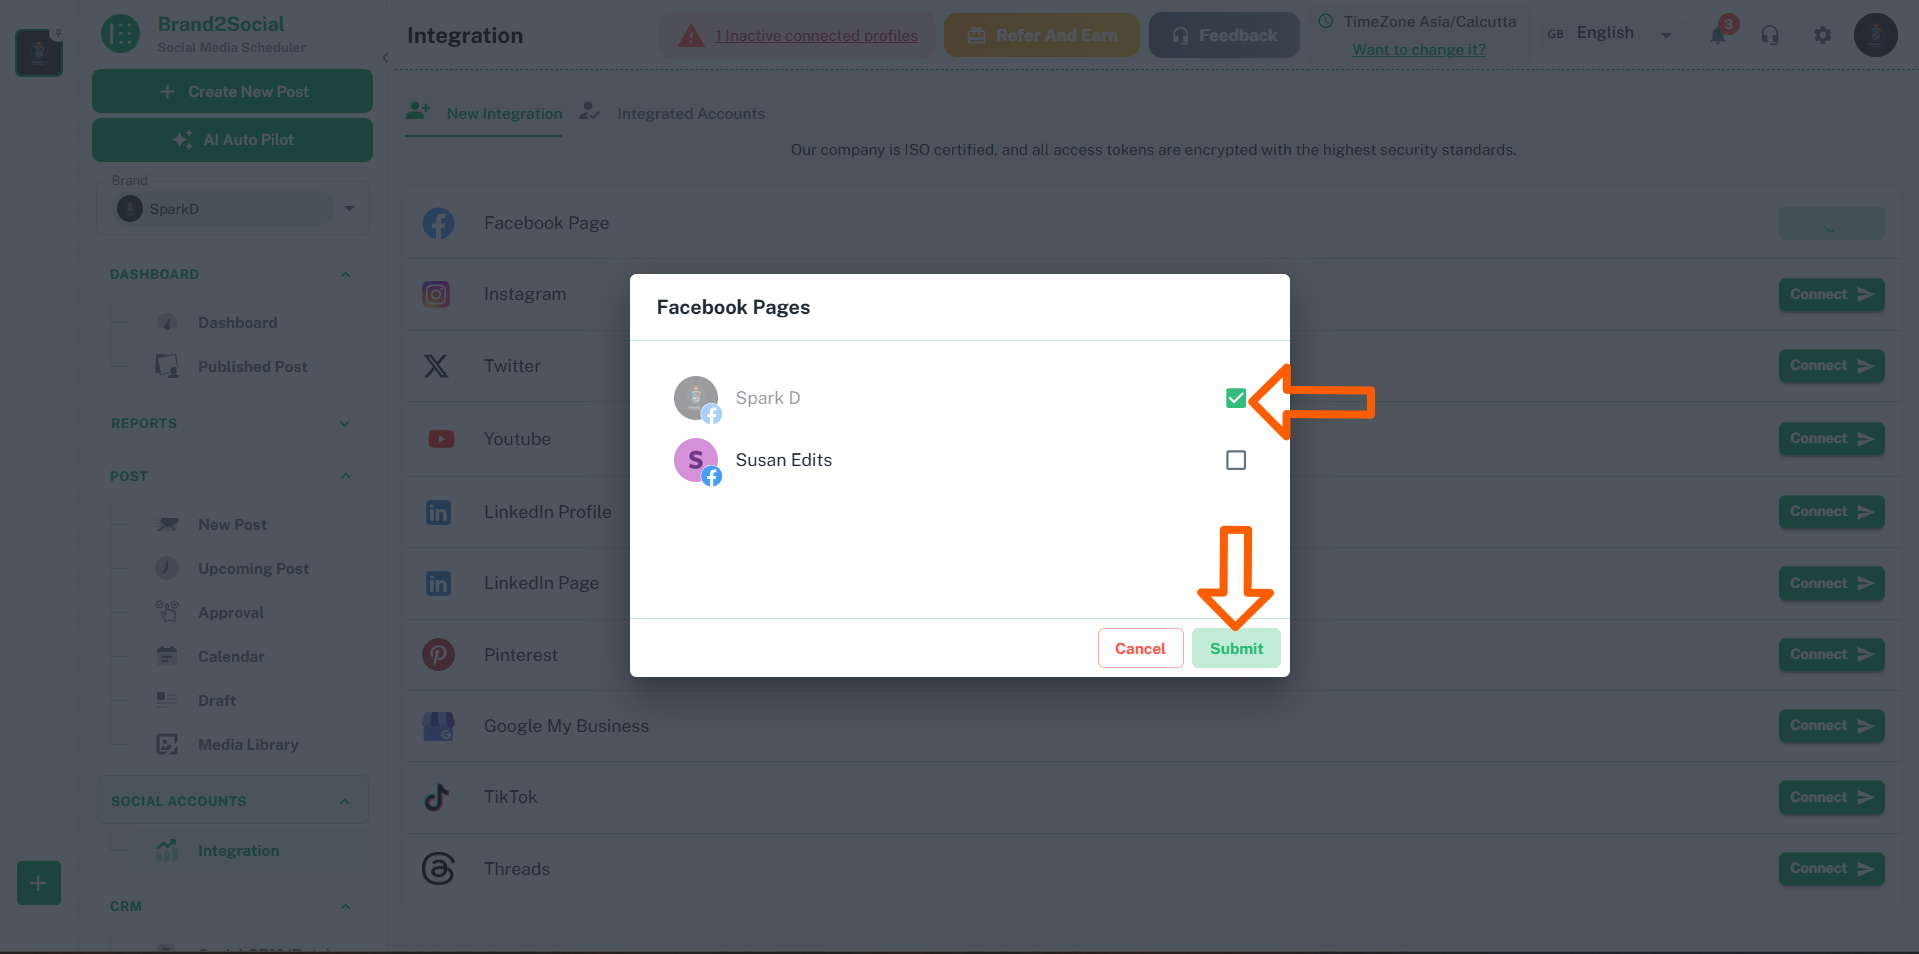
⚠️ Important: Any Page that is not toggled on at this step will not be available in Brand2Social, even if you have admin access to it. You can always reconnect later to add more Pages.
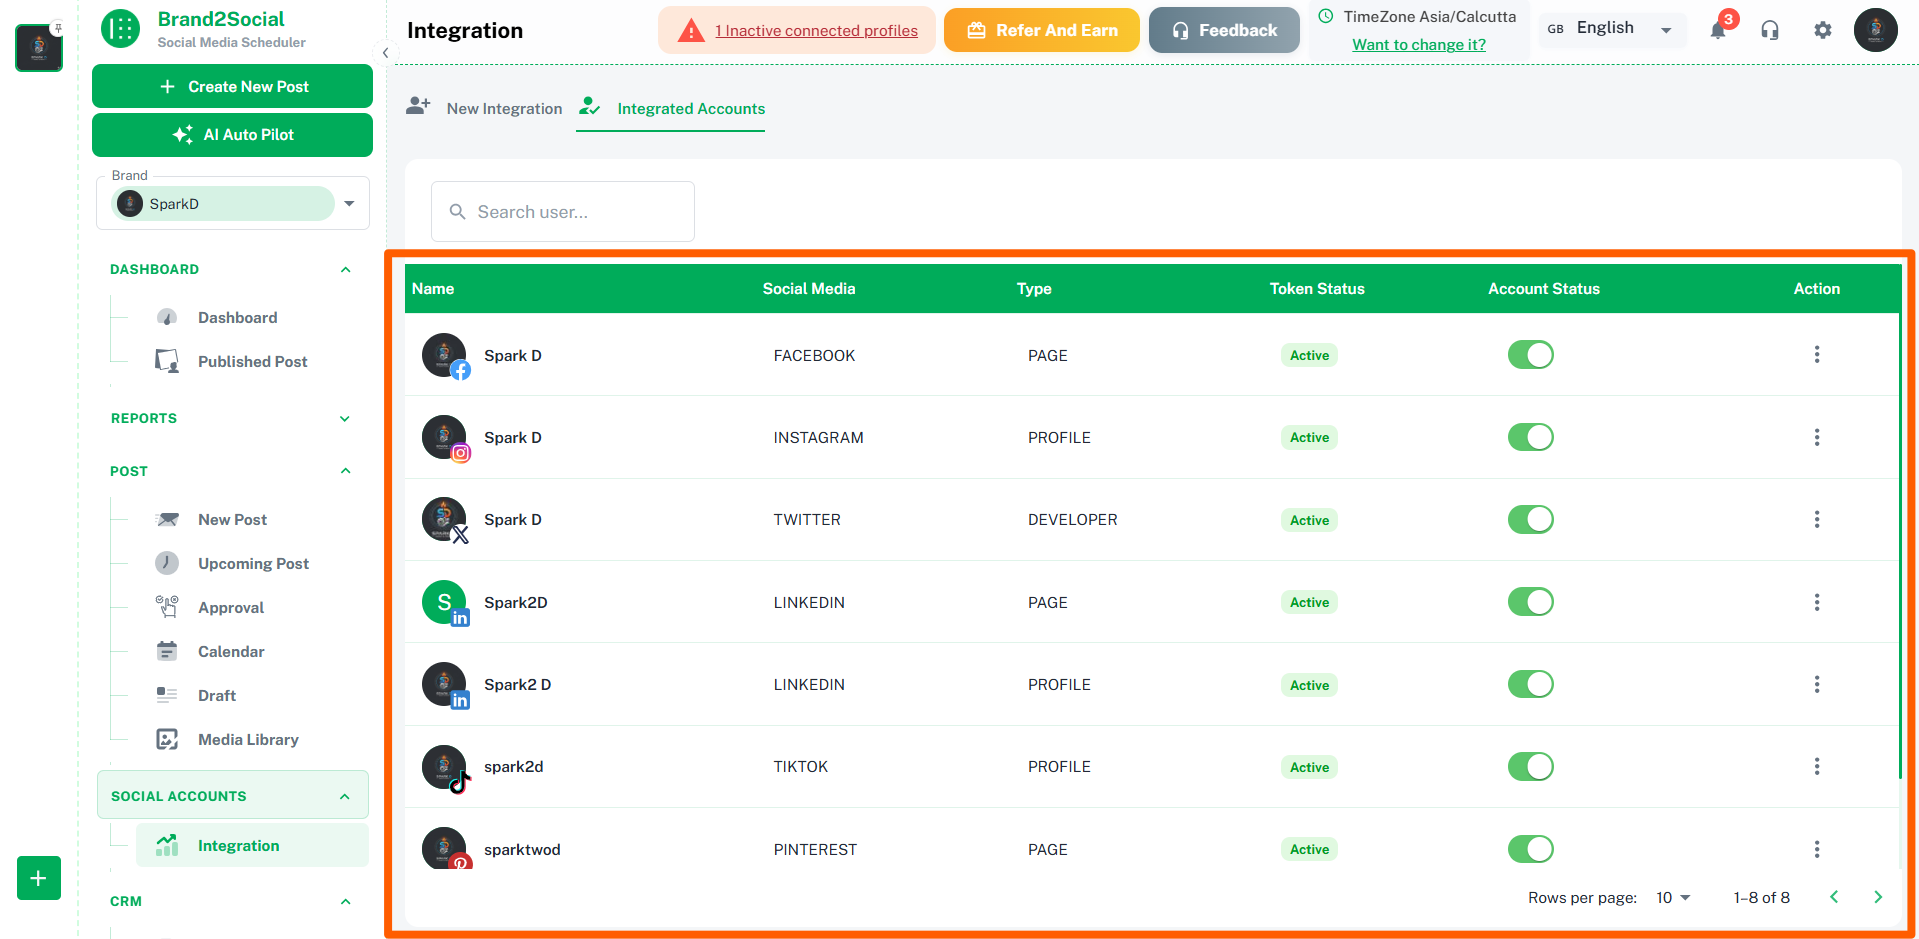
Step 7 — Confirm the Integration
After selecting your Pages and completing the Facebook flow, you will be redirected back to Brand2Social.
1. Brand2Social will process the connection and display your selected Facebook Pages on the Integrations page.
2. Each connected Page will show its Page name, profile picture, and a green Connected status.
3. You can now start creating and scheduling posts for your Facebook Pages directly from Brand2Social.
Troubleshooting Common Issues
“My Facebook Page isn’t listed”
If one or more of your Facebook Pages do not appear during the integration, work through the following checks in order:
Verify Your Admin Role
Only users with a direct Admin role on a Facebook Page can connect it to Brand2Social.
- Go to your Facebook Page and click Settings.
- Navigate to Page Roles (or New Pages Experience → Page access if you are using the new Facebook interface).
- Confirm that your personal profile is listed with the Admin role.
- If you do not have Admin access, ask the current Page owner to grant it to you.
Check for Inherited Admin Roles
It is not possible to connect a Facebook Page to Brand2Social if your Admin access is inherited from a parent Page. This is a Meta API limitation.
- If you see yourself listed as “Admin (inherited from parent Page)”, your role is inherited.
- The Page owner must add you as a direct Admin on the specific Page (not just the parent).
Check Facebook Business Suite Permissions
If your Page is managed through Facebook Business Suite:
- Log in to Facebook Business Suite.
- Navigate to Settings → People (or Business Settings → People & Assets → People).
- Confirm you have Admin access to the specific Page.
- If access is missing, ask your Business Suite Admin to update your permissions.
Reauthorize Facebook Permissions
If you have confirmed the correct Page role and the Page is still not appearing, Brand2Social may not have the required permissions from Facebook.
- Go to the Integrations page in Brand2Social.
- Find your existing Facebook connection.
- Click the three dots (⋮) next to the Facebook Page entry and select Reauthorize.
- Complete Steps 4–6 again, making sure to select all Pages you need and enable all permissions.
Check for Expired Access Tokens
Facebook access tokens expire periodically — especially after a password change or token expiry.
- If a Page shows a Disconnected or Expired status, follow the Reauthorize steps above to refresh your token.
What You Can Do After Connecting
Once your Facebook Pages are successfully connected to Brand2Social, you can take advantage of the following features:
- Schedule Posts — Plan and queue Facebook posts in advance using the visual content calendar.
- Publish Directly — Publish text posts, images, videos, links, and carousels directly to Facebook without leaving Brand2Social.
- Manage Multiple Pages — Connect and manage multiple Facebook Pages from a single dashboard — ideal for agencies and multi-brand teams.
- Analytics & Reporting — Track key metrics including reach, impressions, engagement rate, and post performance across all connected Pages.
- Content Calendar — Visualize your Facebook publishing schedule alongside other platforms (Instagram, LinkedIn, Twitter, etc.) in one unified view.
- Team Collaboration — Assign posts for review, leave feedback, and approve content before it goes live.
- Bulk Scheduling — Upload and schedule multiple posts at once using the bulk scheduler (availability depends on your plan).


