Welcome to Brand2Social — your all-in-one platform for managing, scheduling, and publishing content across all your social media accounts. Whether you are a solo entrepreneur, a small business owner, or part of a larger marketing team, this guide will walk you through everything you need to get up and running.
Step 1 — Create Your Account or Log In
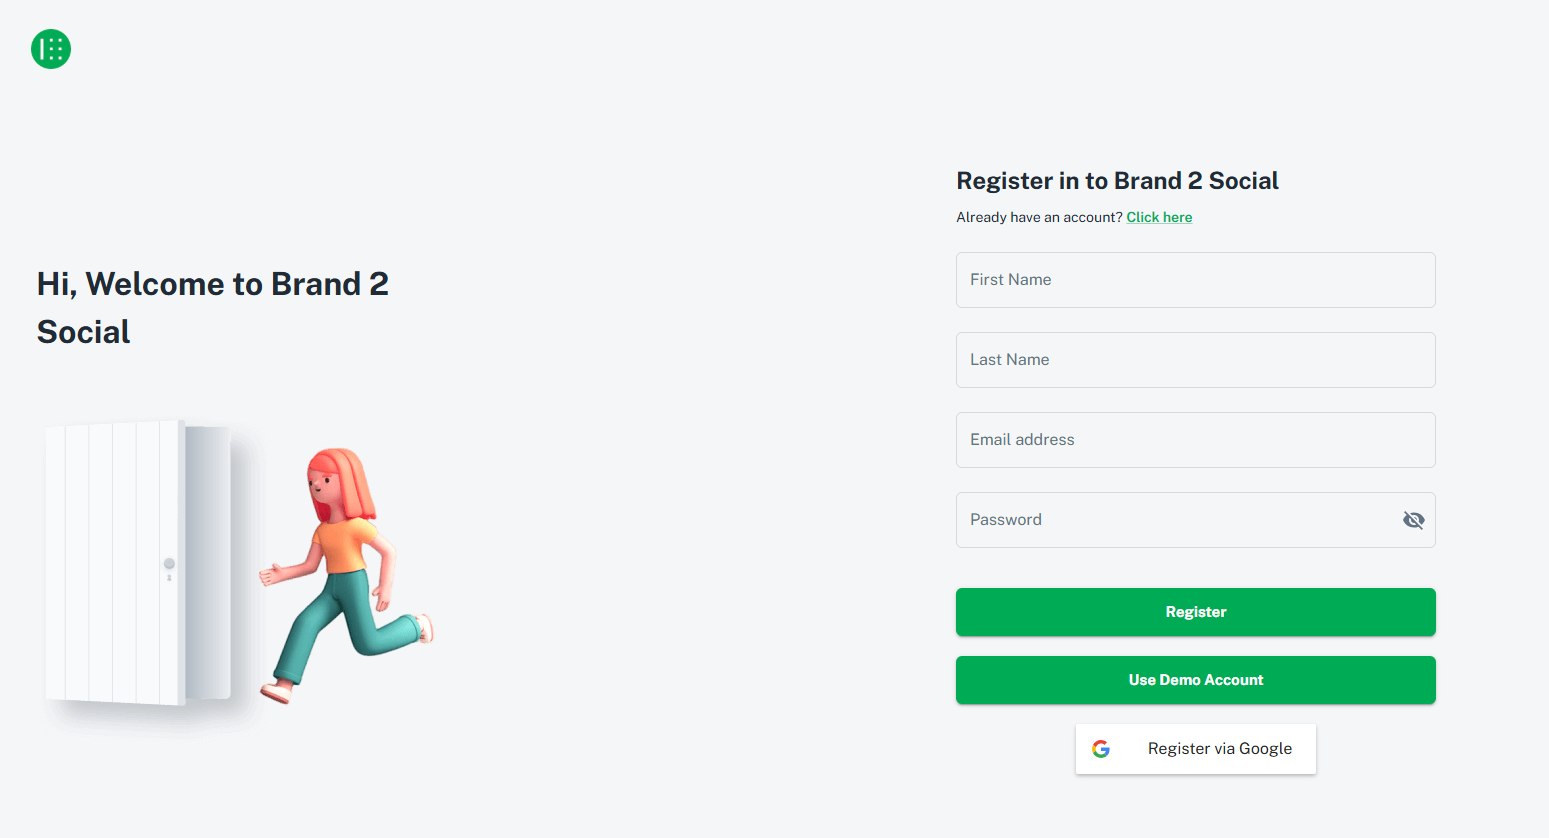
New to Brand2Social?
1. Visit the registration page.
2. Fill in your details and submit the form.
3. Check your email inbox and confirm your registration by clicking the verification link.
4. Once confirmed, you will be taken into your Brand2Social account.

Already have an account?
1. Visit the login page and enter your email address and password.
2. Click Log In to access your dashboard.

ℹ️ Want to explore first? You can log in with our demo account using the email
demo@brand2social.comand the passworddemo1234to explore the platform before setting up your own account.
Step 2 — Set Up Your Brand
When you first log in, you are the Organization Admin of your Brand2Social account. This gives you full control over your workspace, including the ability to create multiple brands — useful if you manage more than one business or client.
Creating Your First Brand
1. Click the plus (+) button at the bottom-left of the main screen.
2. Enter a brand name and description.
3. Upload a profile image to represent the brand.
4. Click Save to create the brand.
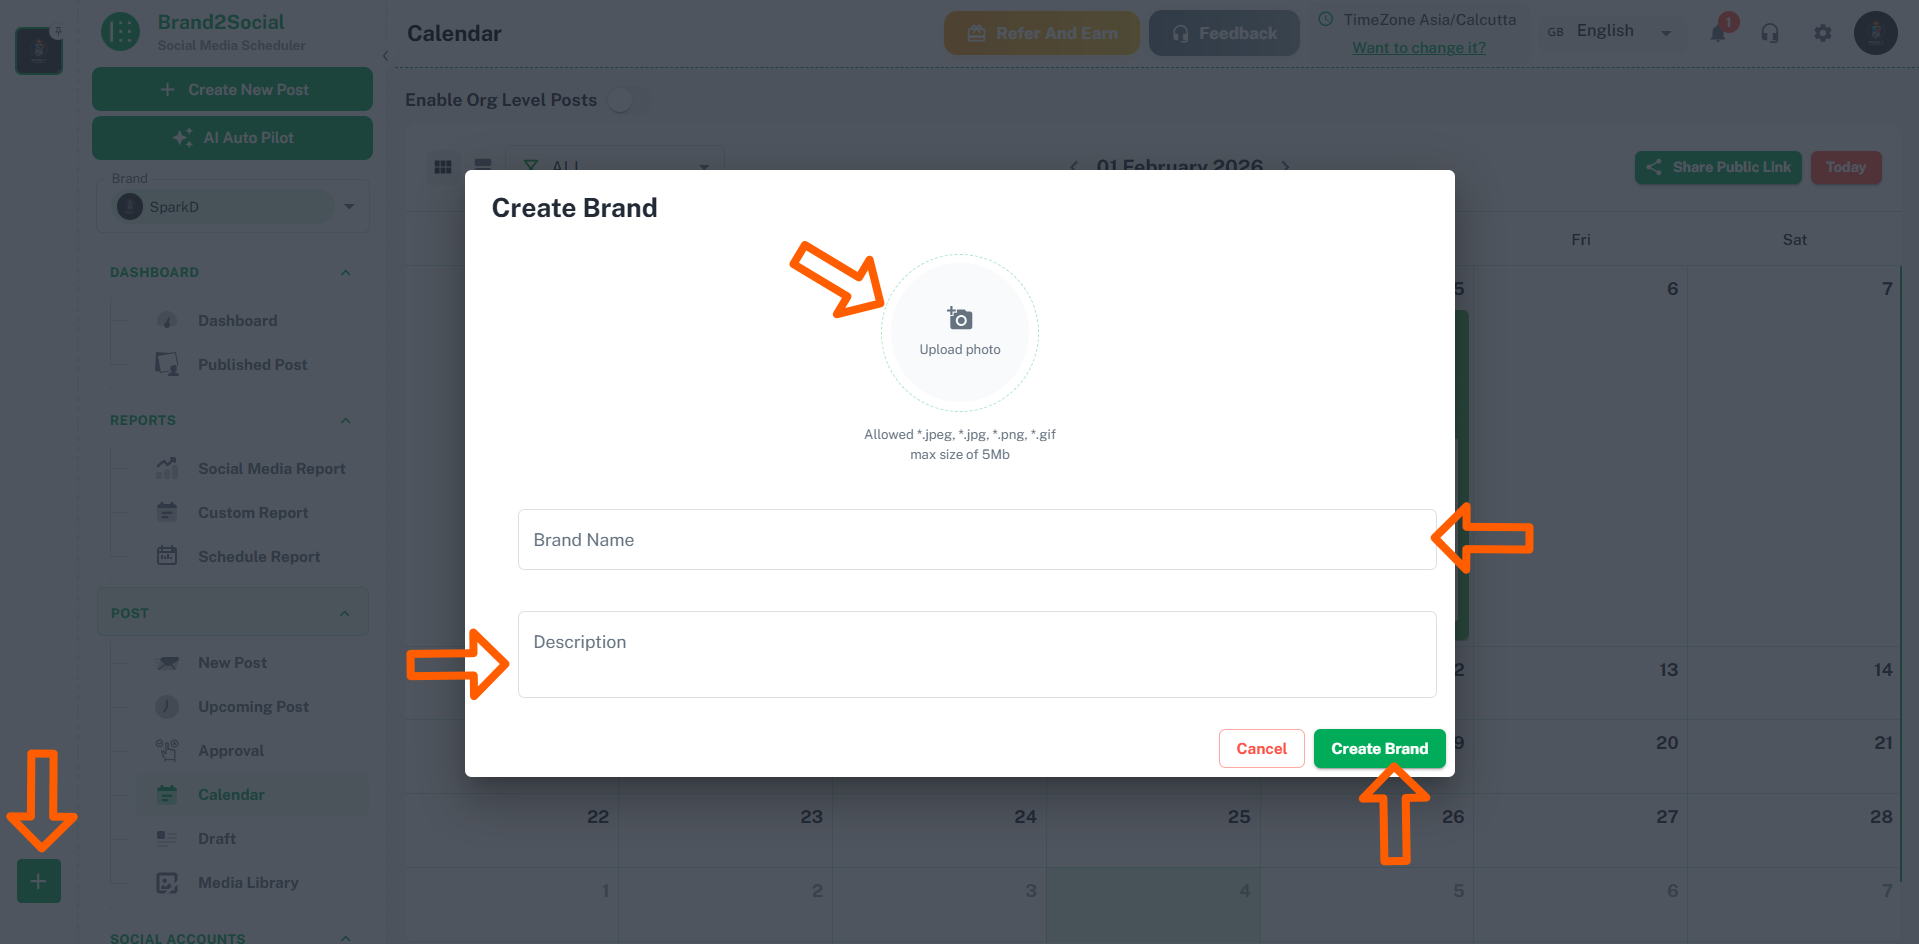
ℹ️ Note: Each brand acts as a separate workspace with its own connected social accounts, content calendar, and team members. This makes it easy to maintain distinct strategies for different clients or business units within a single Brand2Social account.
Step 3 — Connect Your Social Media Accounts
Once your brand is set up, the next step is to connect the social media accounts you want to manage.
1. In the left-side navigation menu, click on Integrations under the Social Accounts section.
2. You will see a list of all supported social media platforms.
3. Click the Connect button next to each platform you want to integrate.
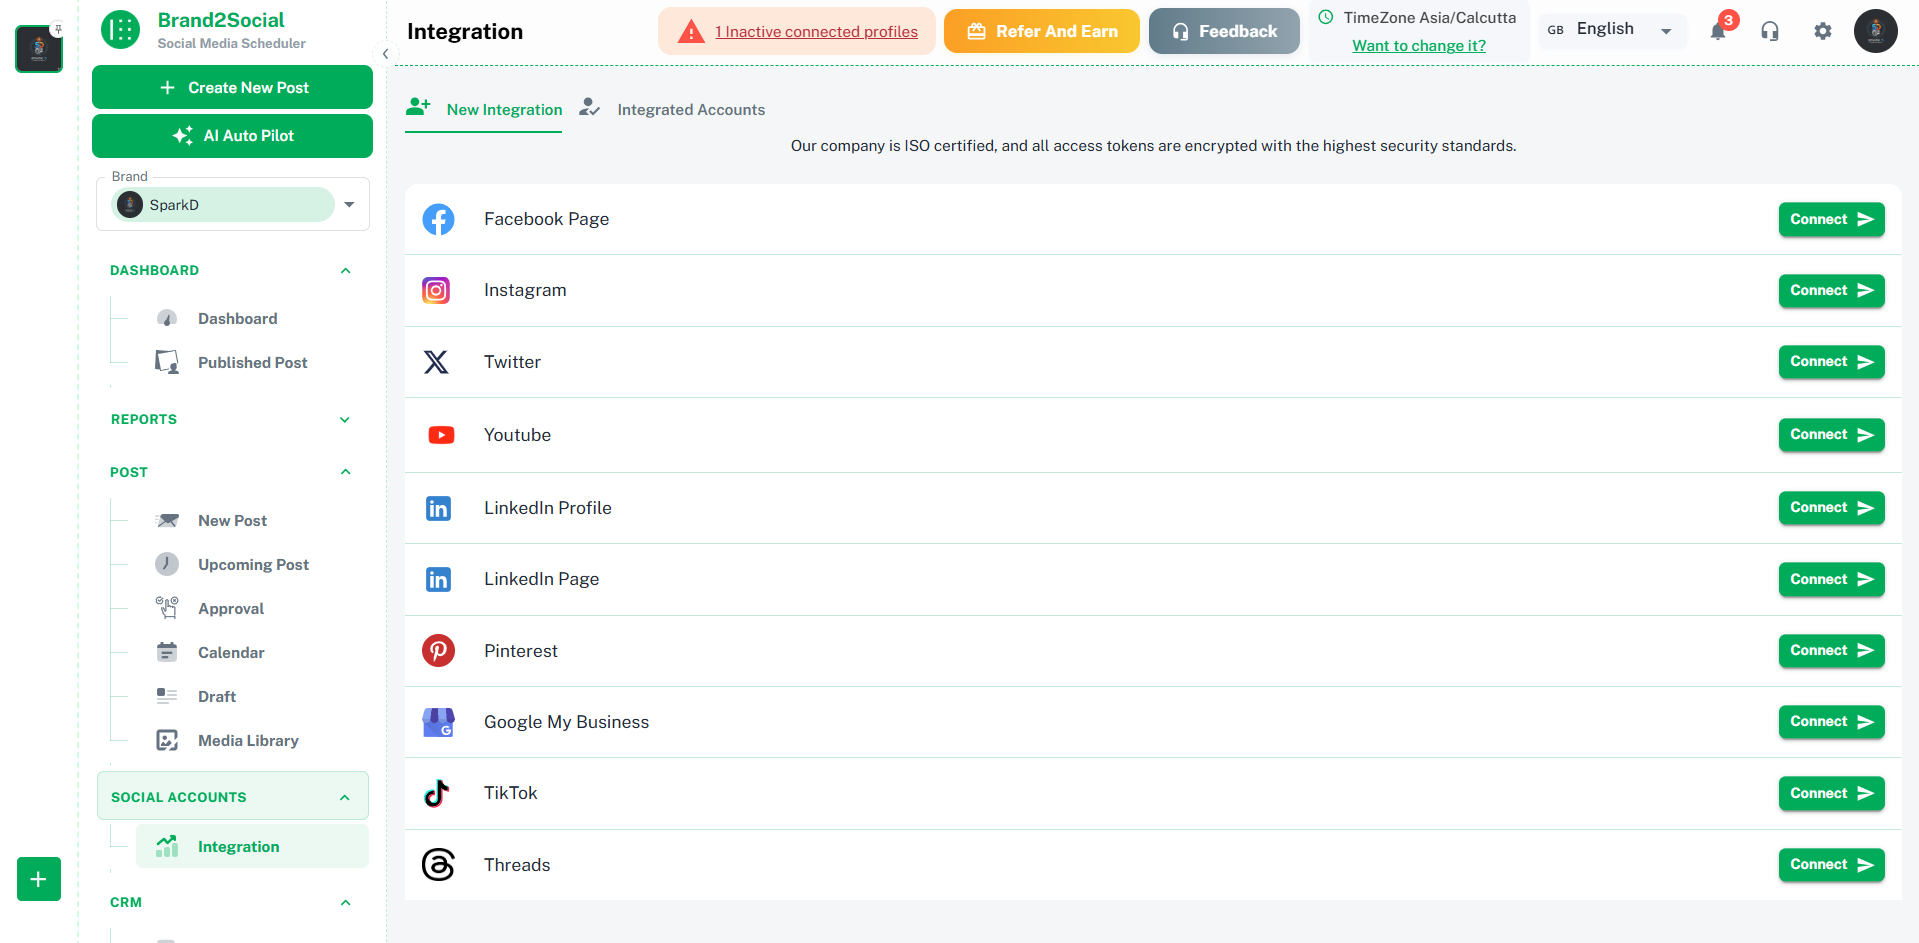
Brand2Social currently supports the following platforms:
- Facebook Pages — including Posts and Reels.
- Instagram — including Posts, Reels, and Stories.
- YouTube — video uploads and scheduling.
- Twitter (X) — posts, threads, and media.
- LinkedIn Pages — company page posts.
- LinkedIn Profile — personal profile posts.
- Google My Business — business updates and offers.
For detailed connection instructions for each platform, refer to the individual integration guides in the Social Integrations section of the help center.
Step 4 — Invite Your Team
If you are working with a team, you can invite members to collaborate within your brand workspace.
1. Navigate to Settings in the left-side navigation menu.
2. Click on Team Members or Users.
3. Click Invite Member and enter the team member’s email address.
4. Assign them an appropriate role (e.g., Admin, Editor, Approver) and click Send Invite.
5. The team member will receive an email invitation to join the workspace.
ℹ️ Note: Different roles have different levels of access. Admins can manage integrations and team settings, while Editors can create and schedule posts. Approvers can review and approve content before it goes live.
Step 5 — Create and Schedule Your First Post
With your accounts connected, you are ready to start publishing.
1. Click the Create Post button (or click on a date in the Calendar view).
2. Select the social media accounts you want to publish to.
3. Write your post content, add images or videos, and include any links.
4. Choose a publishing option:
- Post Now — publishes the post immediately.
- Schedule — sets a specific date and time for the post to go live.
- Save as Draft — saves the post for review or editing before scheduling.
- Plan — adds the post to your content plan without setting a specific time.
5. Click the relevant button to confirm.
What You Can Do with Brand2Social
- Schedule Posts — plan and queue content across all platforms from a single interface.
- Manage Multiple Brands — organize different clients or business units under separate brand workspaces.
- Team Collaboration — assign posts for review, leave comments, and set up approval workflows before content goes live.
- Content Calendar — visualize your entire publishing schedule in a unified calendar view across all platforms.
- Analytics & Reporting — track post performance, engagement, and follower growth directly within Brand2Social.
- Published Posts — review and analyze all content that has gone live across your connected accounts.
Frequently Asked Questions
How secure is my data?
Your data is secured with industry-standard encryption.
What support options are available?
Brand2Social offers 24/7 chat support, email support, and an extensive help center.
Does Brand2Social offer any training or tutorials?
Yes — video tutorials, webinars, and a comprehensive help center are all available to help you get the most out of the platform.
How easy is it to switch from another social media management tool?
Very easy. The support team can guide you through the migration process to ensure your data and settings are transferred seamlessly.
Can I schedule posts for different time zones?
Yes. Brand2Social allows you to schedule posts in different time zones, ensuring your content reaches the right audience at the right time.


