Brand2Social’s calendar is more than just a scheduling view — it can be configured to match the way you and your team prefer to work. This guide covers the two key calendar customizations available: Extended Calendar Events and Scheduled Drafts.
Extended Calendar Events
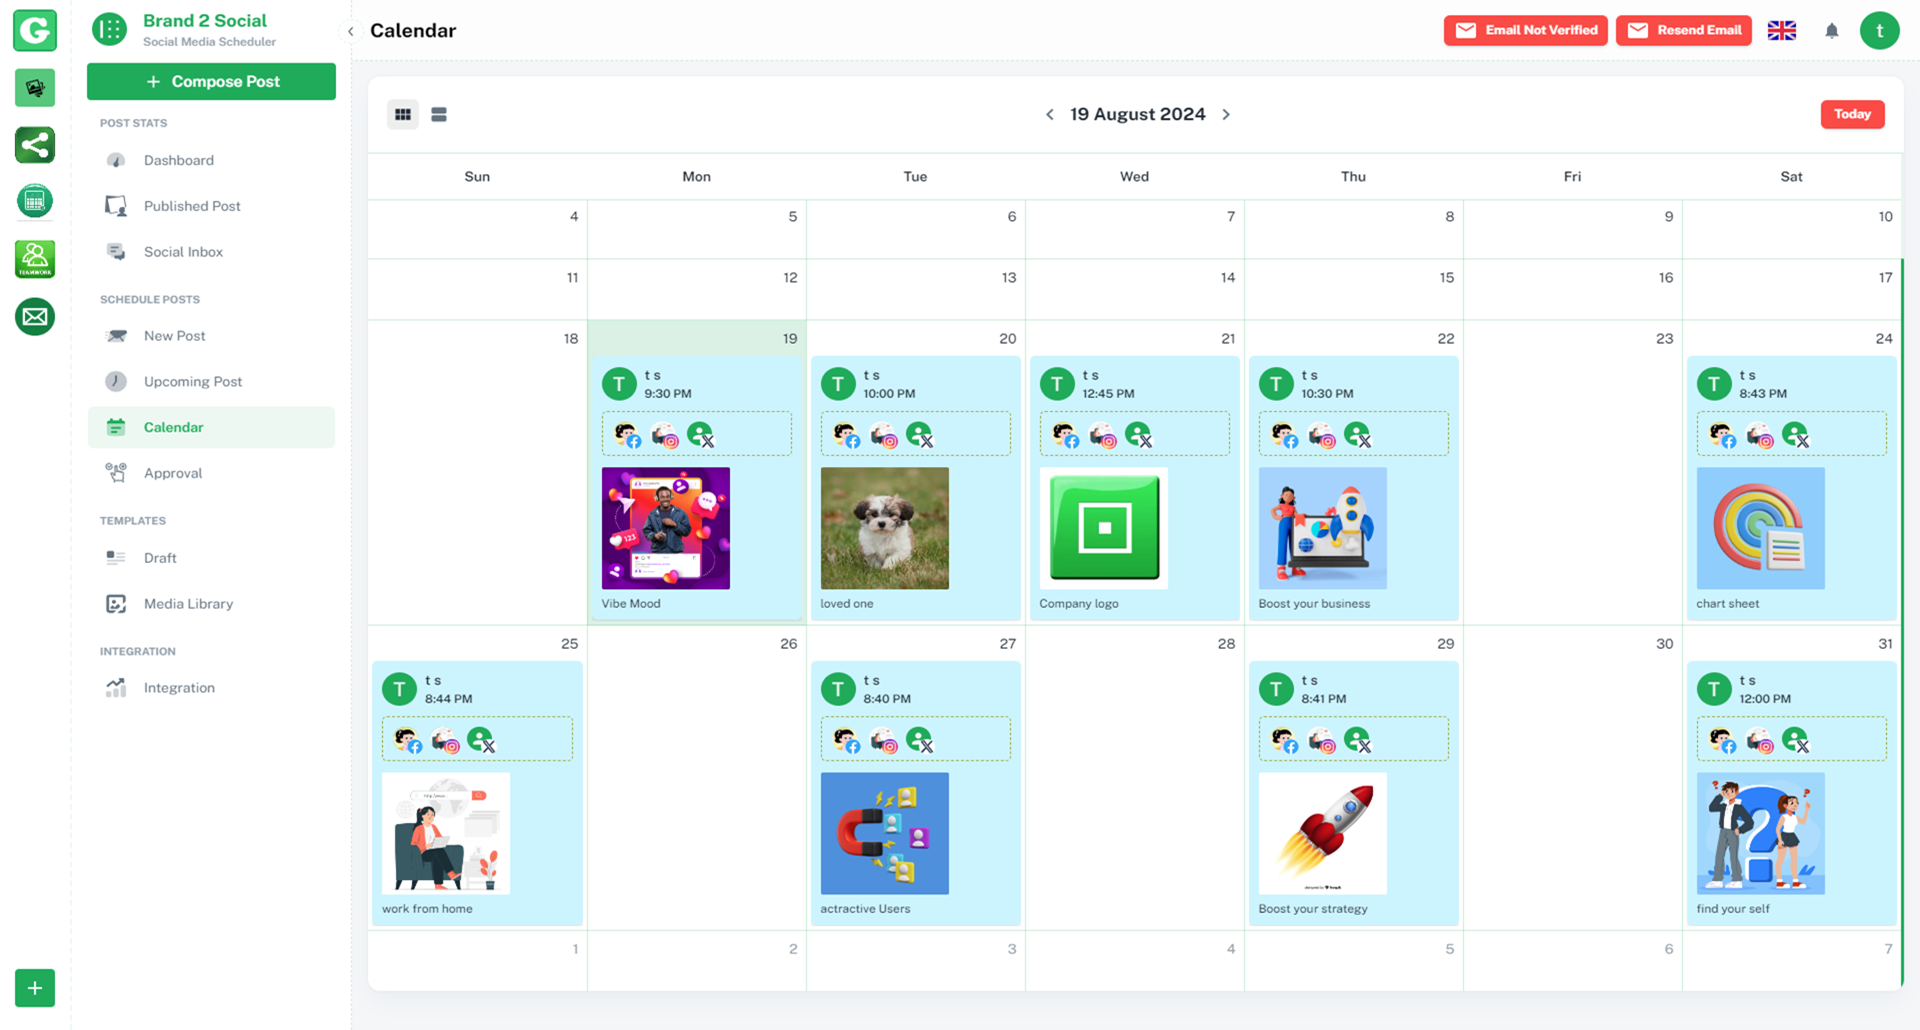
By default, the calendar displays simple, compact events to give you a quick overview of your scheduled content.
When the Extended Calendar Events feature is turned on, each event expands to show richer content details alongside the scheduled time, including:
- Image preview — see the visual attached to the post directly on the calendar.
- Video preview — thumbnail preview for video posts.
- Link metadata — when a URL is included in the post, the calendar will display the link’s preview image, title, and description.
This is particularly useful for visual content planning, allowing you and your team to review the look and feel of your content calendar without having to open each post individually.
How to Enable Extended Calendar Events
1. Log in to your Brand2Social account.
2. Navigate to Settings in the left-side navigation menu.
3. Click on the Display Settings section (this can also be found under Workspace Settings).
4. Locate the Extended Calendar Events toggle and turn it on.
5. Return to the calendar — your events will now display the expanded view.
ℹ️ Note: Extended calendar events apply to your entire workspace. All team members in the workspace will see the expanded view once it is enabled.
Scheduled Drafts
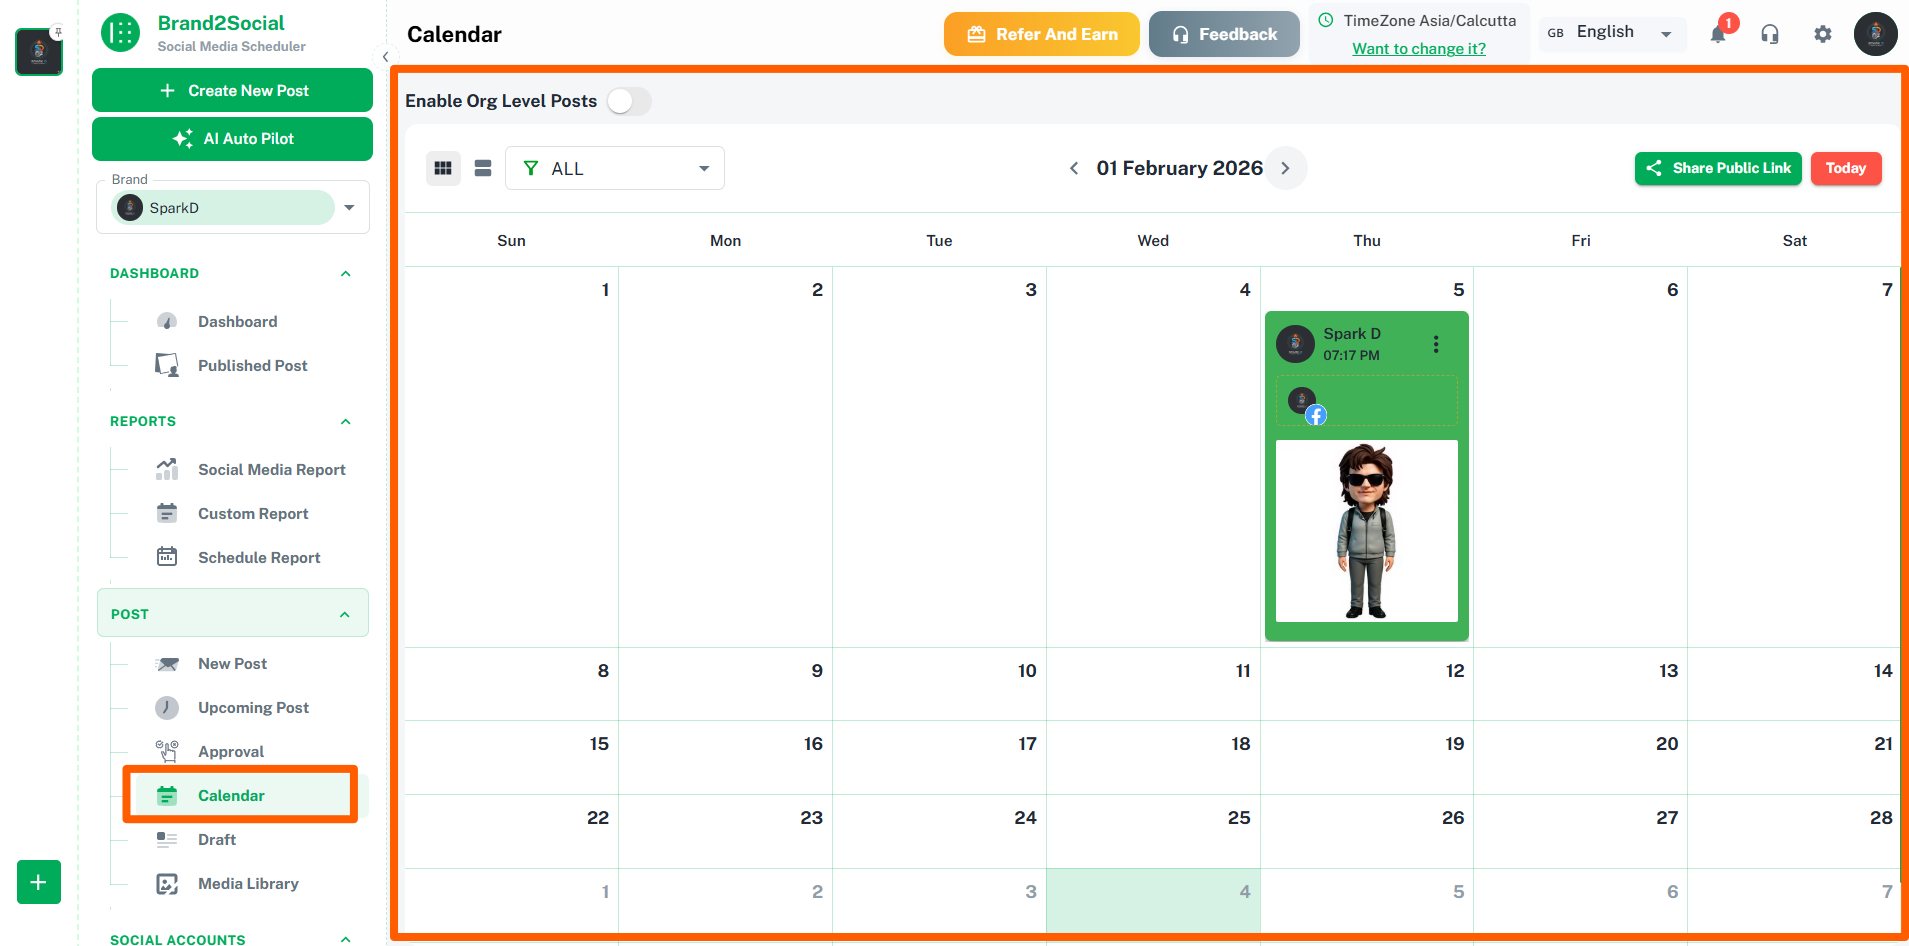
For some workflows, it is useful to assign a time slot to a post before the content is fully written or approved — essentially reserving a spot on the calendar while the post is still being worked on.
The Scheduled Drafts feature makes this possible. When enabled, draft posts that have a time assigned to them will appear on the calendar, even though they have not yet been formally scheduled.
This works especially well in combination with post notes, where you can describe or outline the idea for a post while the content is still being developed.

How to Create a Scheduled Draft
1. Start creating a new post in Brand2Social as you normally would.
2. Under the Scheduled tab, click the Pick time button to assign a date and time to the post.
3. Do not click the Schedule or Plan button — leave the post in draft mode.
4. The post will remain in Draft status, even though a time has been assigned.
5. Go to the calendar — the post will now appear as a scheduled draft at the time you selected.
ℹ️ Note: A scheduled draft will not be published at its assigned time. It is simply a placeholder on the calendar. You must return to the post and formally schedule it before it will go live.
How to Publish a Scheduled Draft
When the post content is ready to go:
1. Locate the draft on the calendar and click Edit.
2. Under the Scheduled tab, click Schedule as you normally would.
3. The post will move from draft status to scheduled and will publish at the assigned time.
How to Enable Scheduled Drafts
1. Navigate to Settings in the left-side navigation menu.
2. Click on the Display Settings or Workspace Settings section.
3. Locate the Scheduled Drafts toggle and turn it on.
4. Return to the calendar — draft posts with an assigned time will now be visible.
Troubleshooting Common Issues
Extended calendar events are not showing image or link previews
- Confirm the Extended Calendar Events toggle is enabled in Settings → Display Settings.
- Image previews will only appear if the post has an image or video attached. Text-only posts will not show a media preview.
- Link metadata previews depend on the linked website supporting Open Graph tags. If the website does not, no preview will appear.
My scheduled draft is not appearing on the calendar
- Confirm that the Scheduled Drafts toggle is enabled in Settings → Display Settings or Workspace Settings.
- Make sure you clicked Pick time to assign a date and time to the draft. A draft without a time assigned will not appear on the calendar.
- Ensure you did not click Schedule or Plan — if you did, the post has been formally scheduled and will appear as a standard scheduled post, not a draft.
I accidentally scheduled a draft — how do I move it back to draft?
- Open the post from the calendar or the post list and click Edit.
- Change the post status back to Draft and remove the scheduled time if needed.
See Calendar Customization in Action
Watch this quick demo to see Extended Calendar Events and Scheduled Drafts in action, and how to enable them.


