Learn how to retarget visitors to your website by creating a Custom Audience in Facebook Ads with this detailed step-by-step guide.
In today's digital marketing landscape, precision and relevancy are the keystones of successful advertising campaigns. Facebook, with its robust targeting capabilities, offers a golden opportunity for businesses to re-engage visitors who have already shown interest in their products or services by visiting their website. This practice, known as retargeting, allows you to serve targeted ads to a defined audience who has previously interacted with your online content but may not have converted. This guide will walk you through the step-by-step process of setting up a Facebook ad campaign aimed specifically at people who have visited your website, using Facebook's powerful Ads Manager tool.
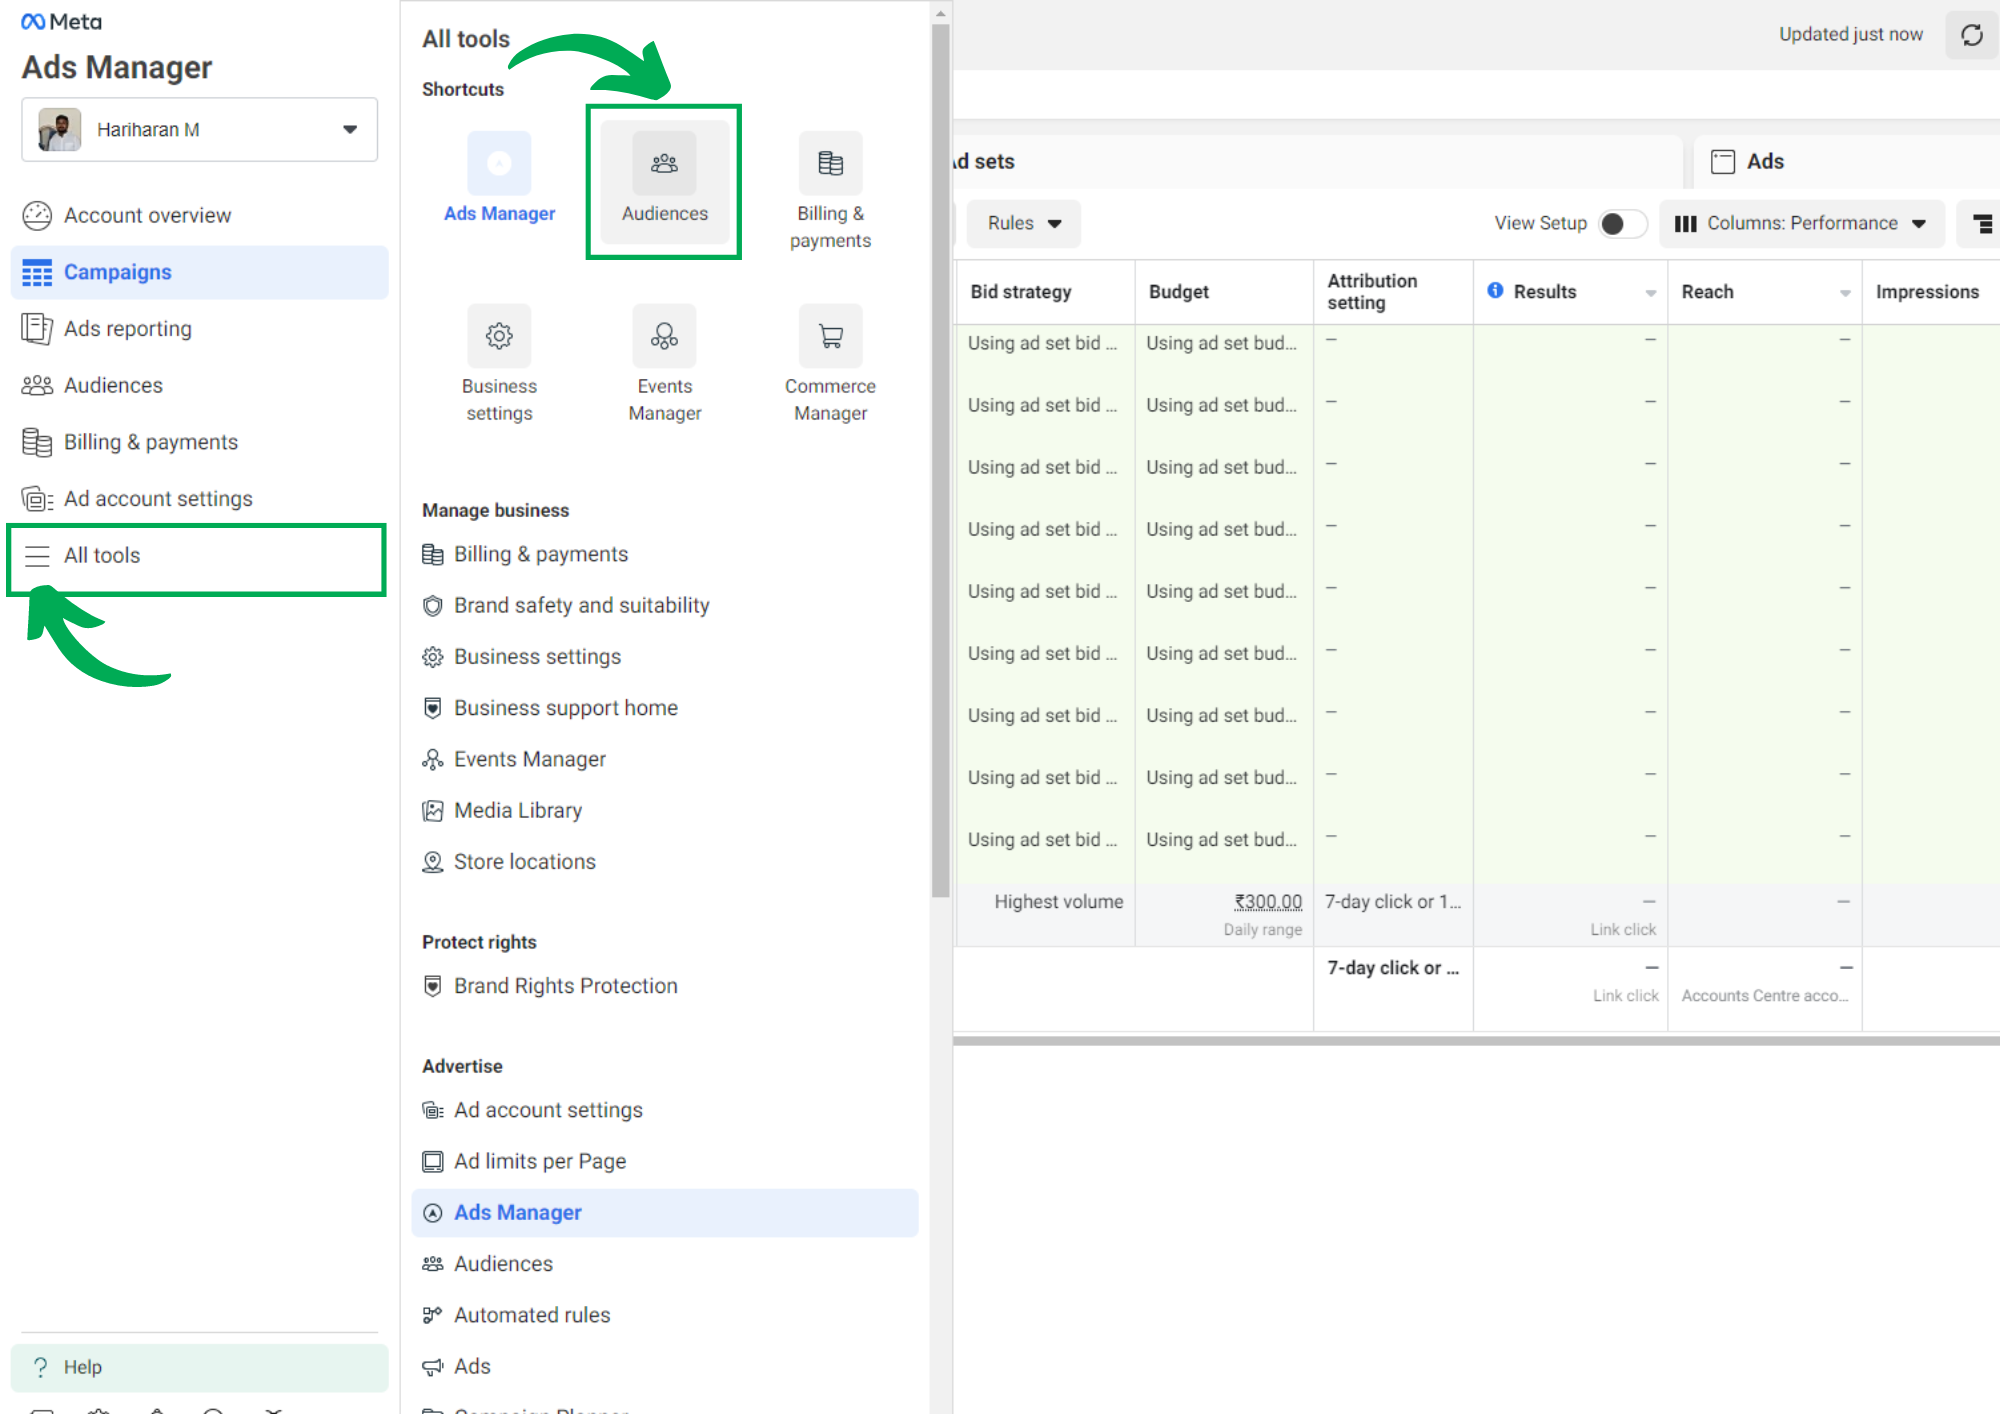
First, you need to log into your Facebook Ads Manager. This is your central hub for all advertising activities on Facebook, where you can manage your ads, view detailed reports, and set up new campaigns.
Navigate to Ads Manager: Go to your Facebook page and access the Ads Manager from the menu. You can find it under "Manage Ads" or by directly visiting Facebook Ads Manager.
Once inside Ads Manager, you’ll focus on setting up a new audience.
Open the Audiences Tool:From the Ads Manager dashboard, select the ‘Audiences’ option. This can usually be found under the 'All Tools' menu which expands to show various features related to audience management.
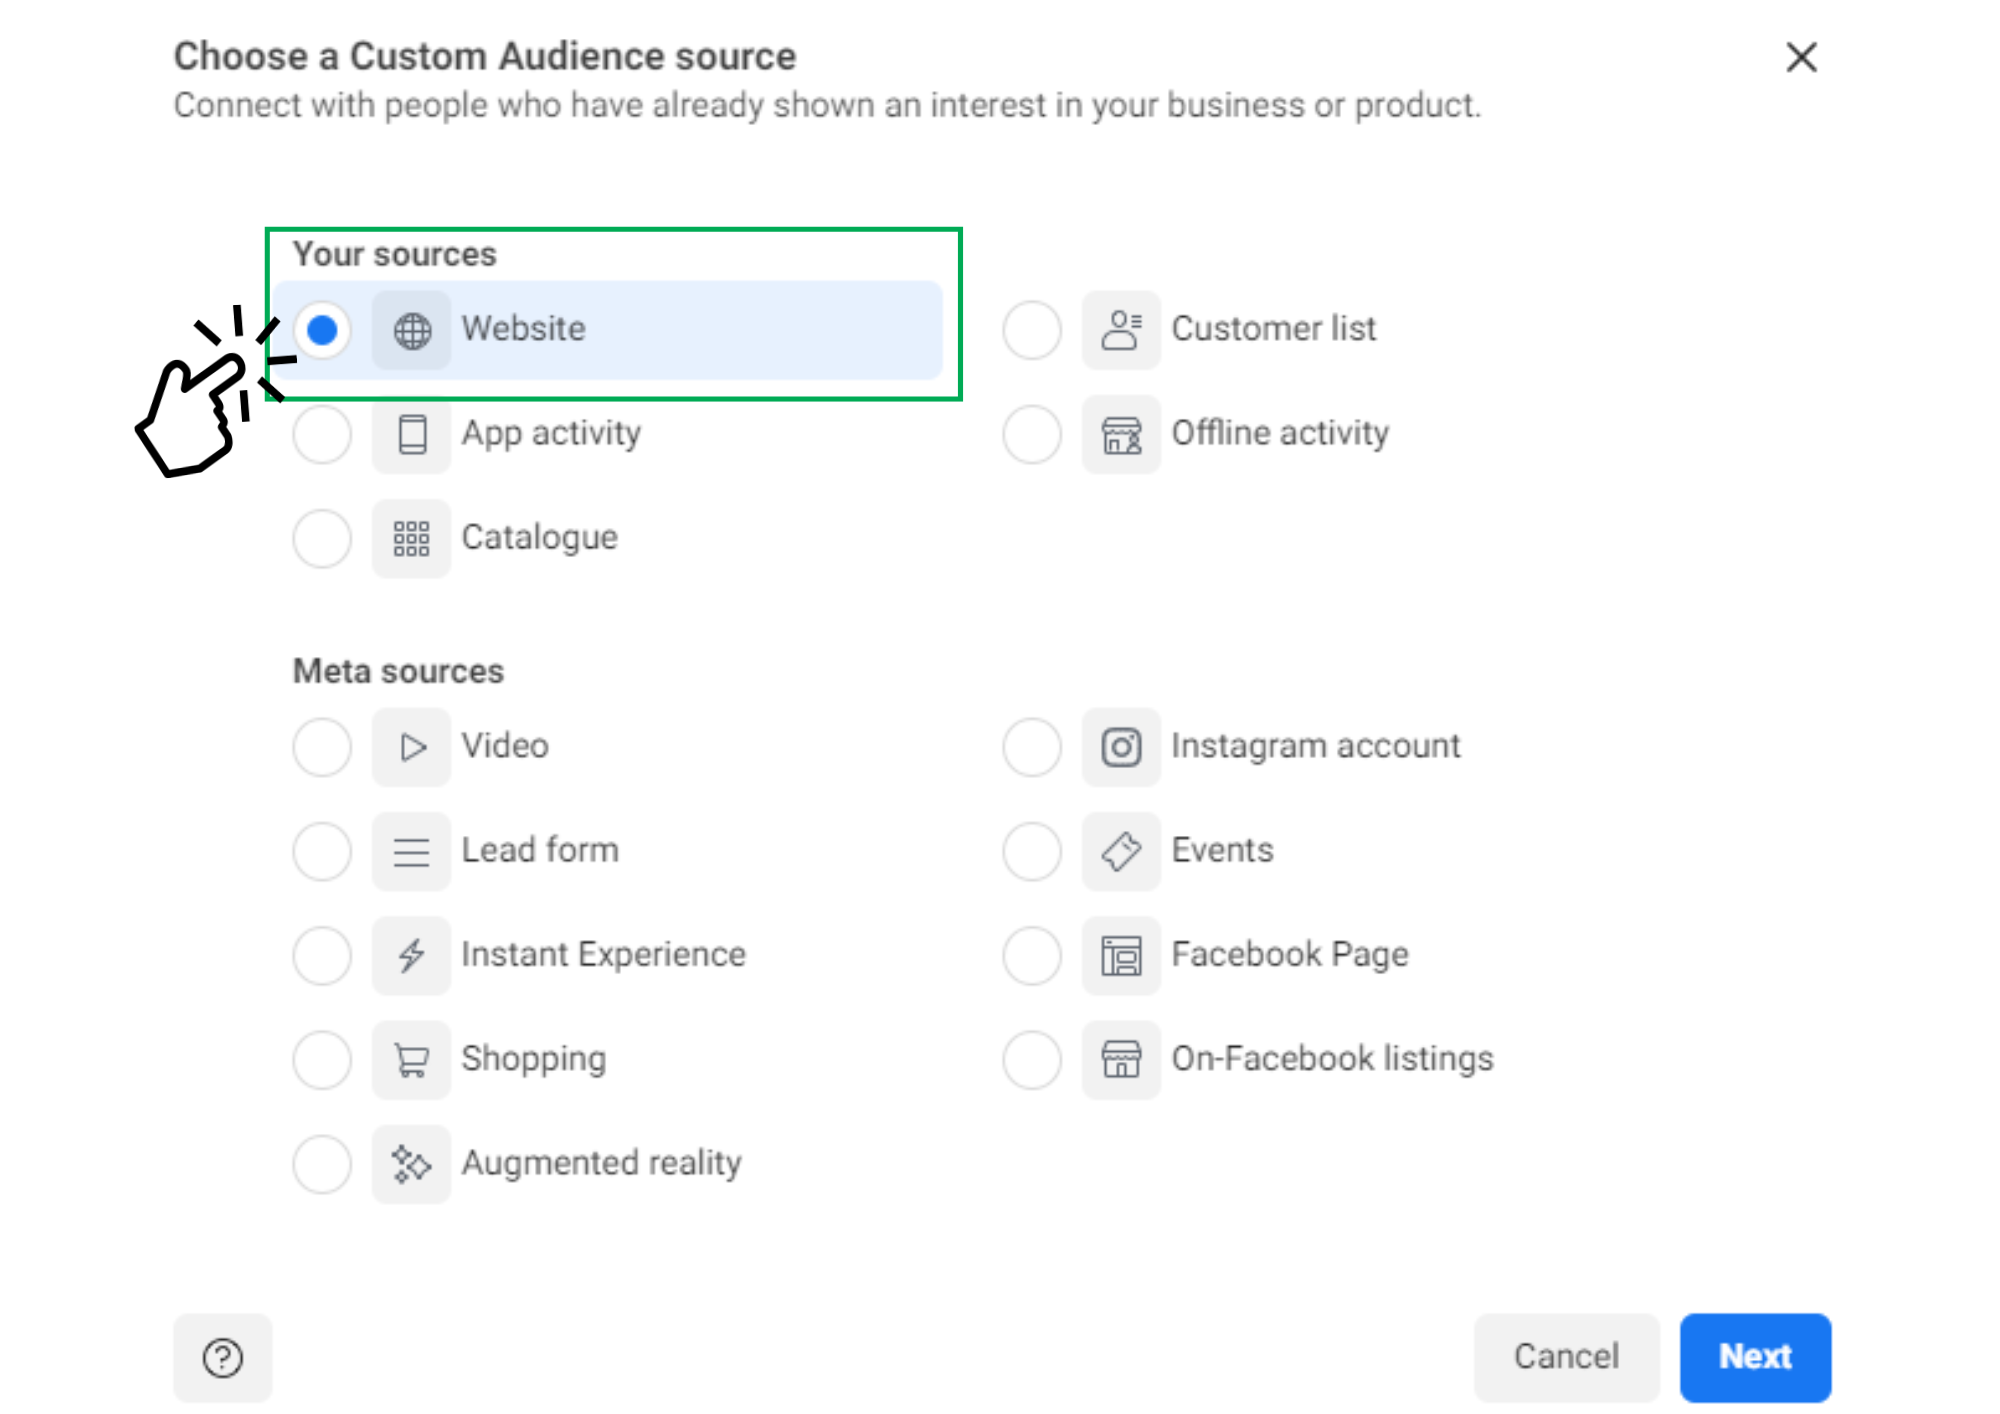
Here, you’ll define where your audience data will come from.
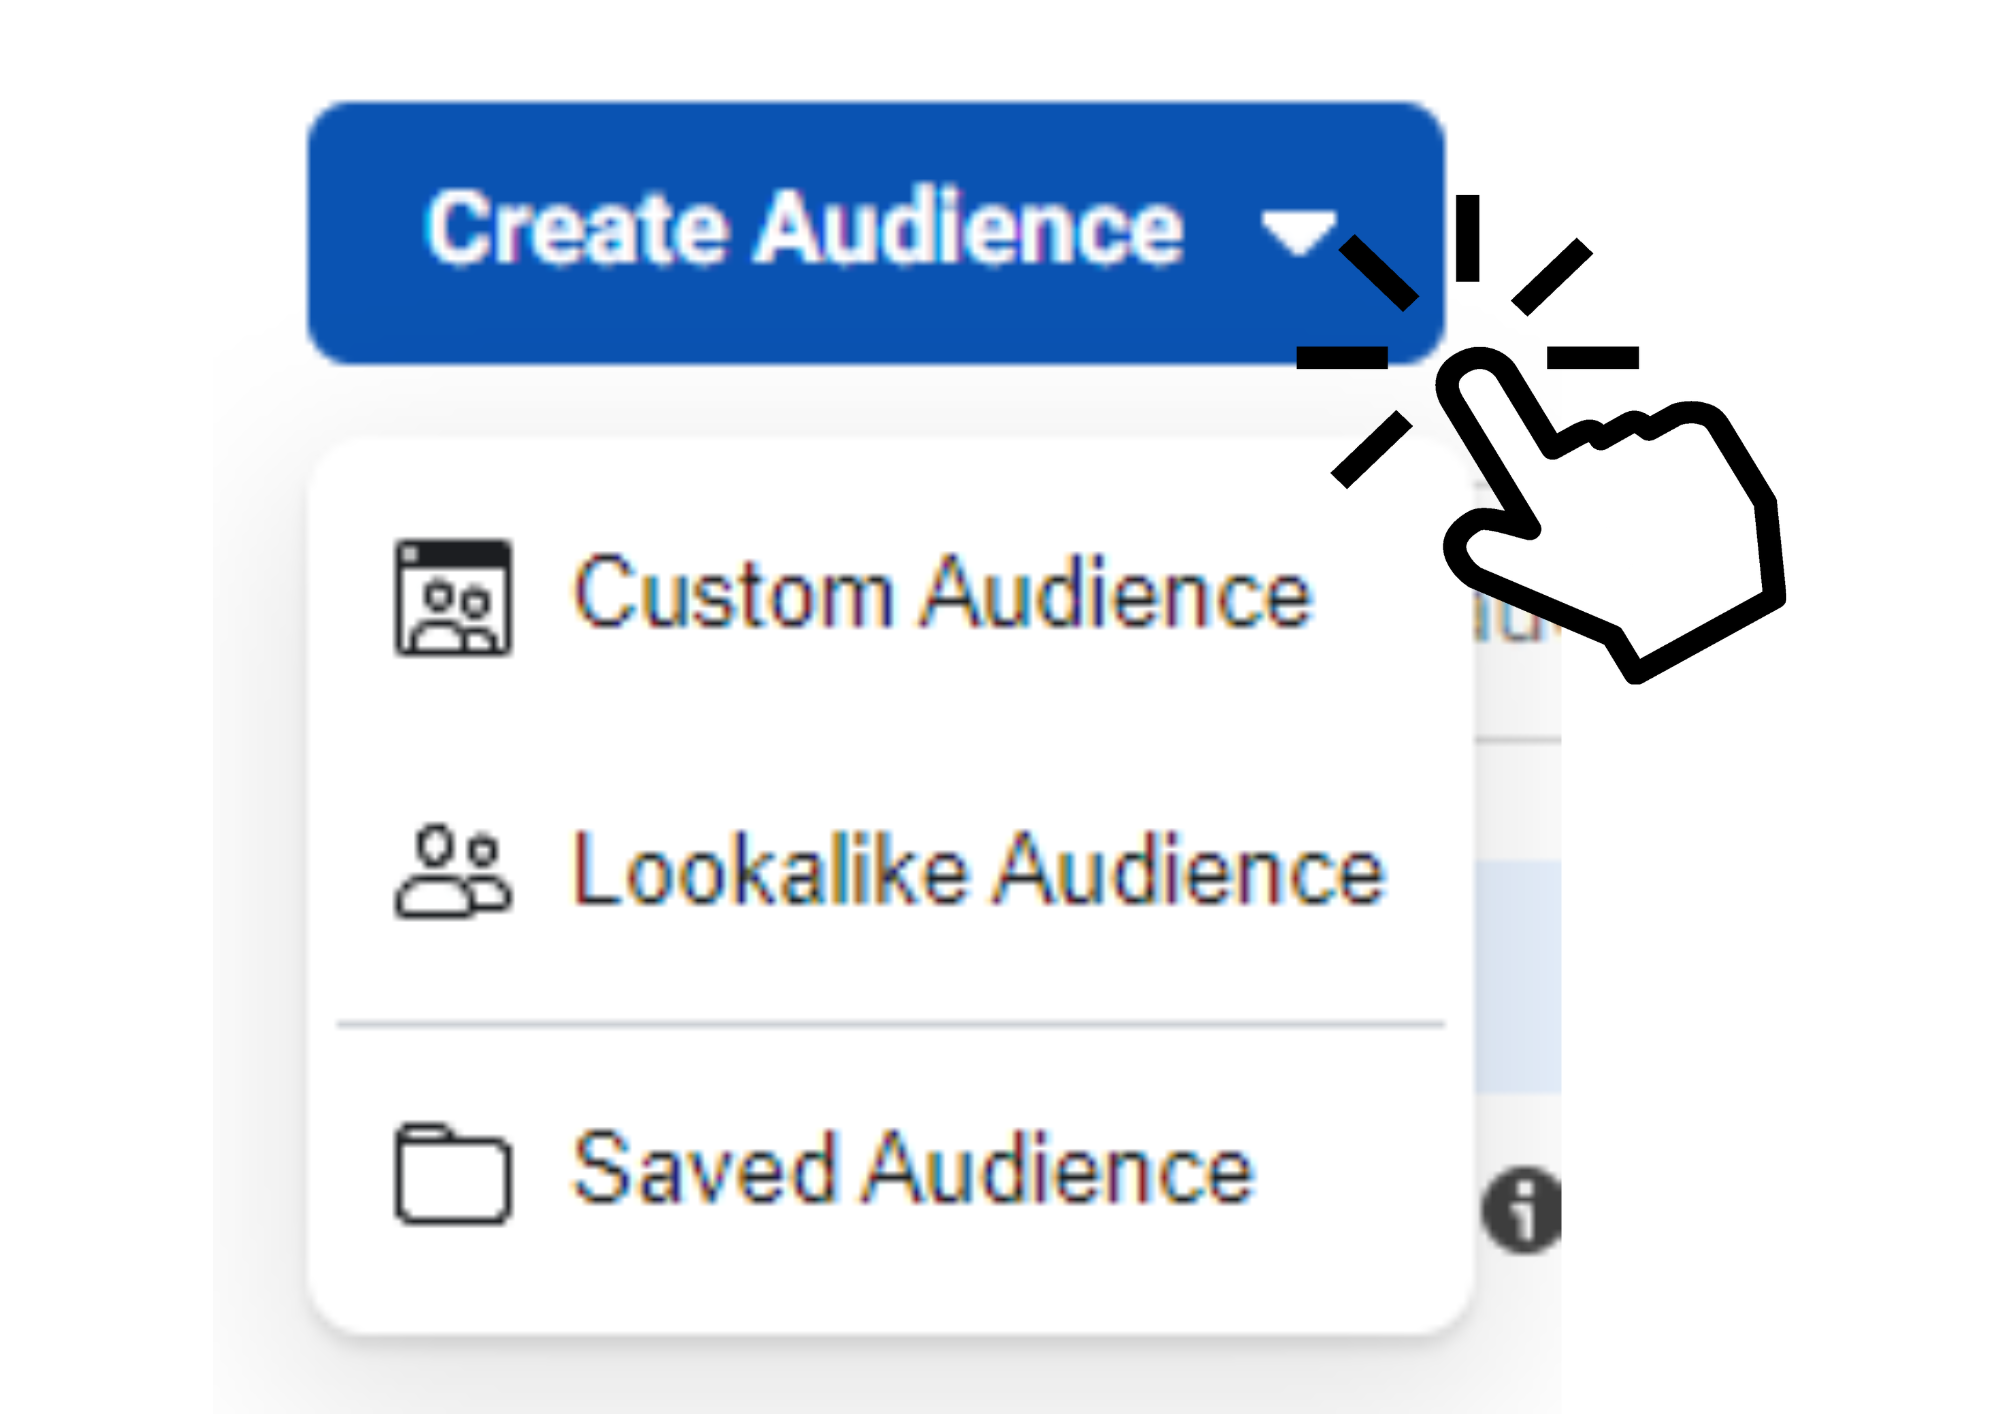
Create Custom Audience:Click on 'Create Audience' and choose 'Custom Audience' from the drop-down menu. This type of audience allows for targeting based on prior engagement or interactions.
Choose Website Traffic:Among the options presented, select ‘Website’. This option allows you to create an audience from users who visited your website. It’s crucial to have Facebook Pixel installed on your website, as it collects the data needed to identify these users on Facebook.
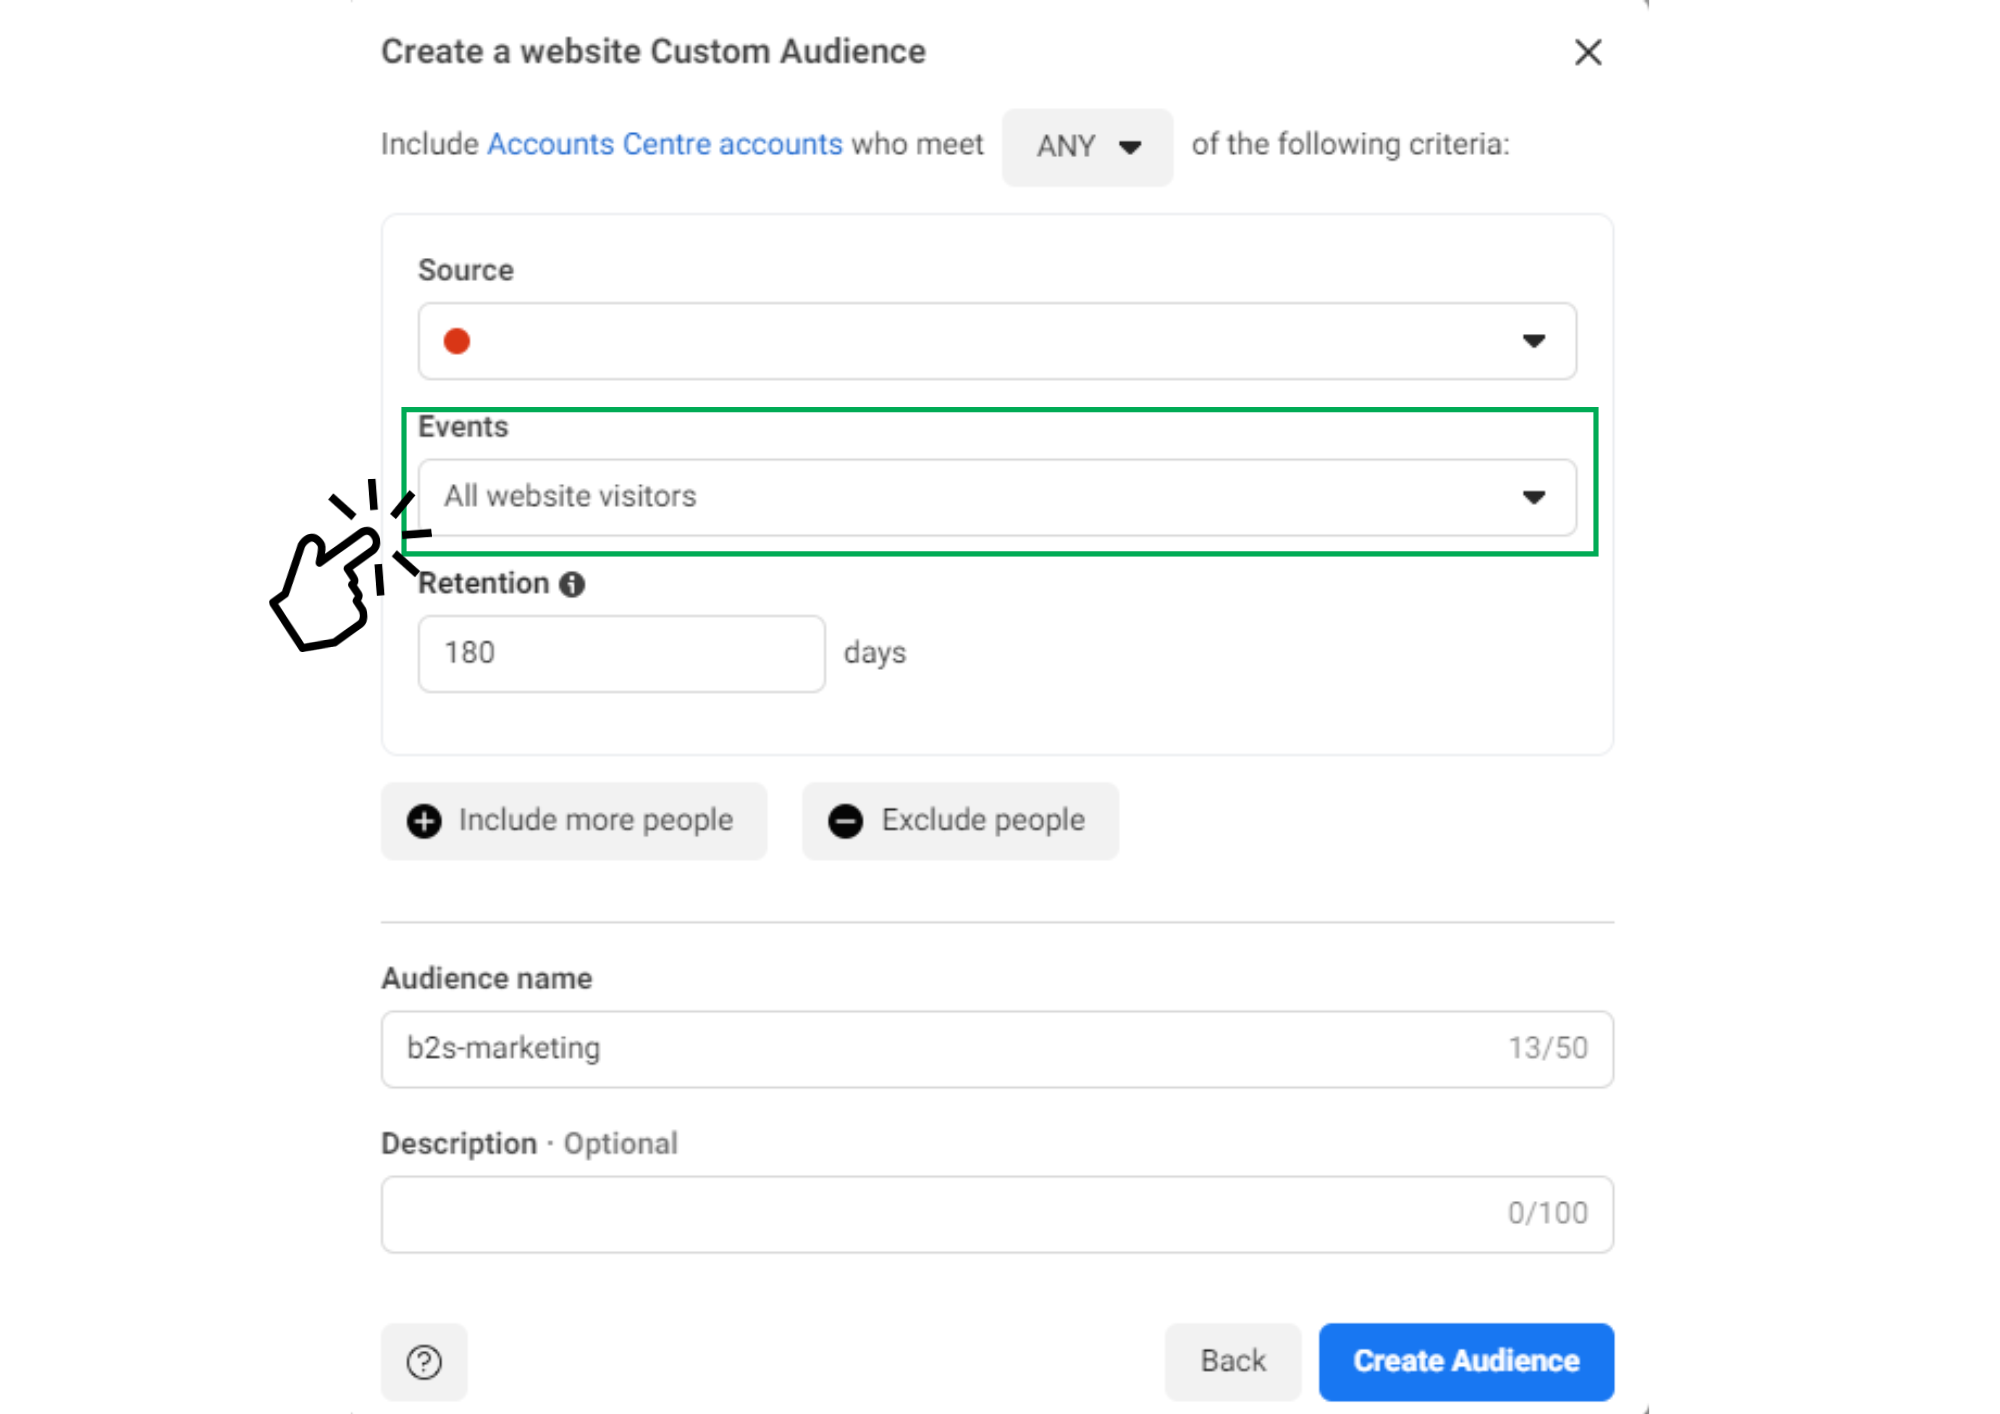
This step involves defining which visitors to your website you want to target.
Specify Visitor Types:You can select to target all visitors or you can narrow down to people who visited specific pages. For example, you might want to target users who visited your pricing page but didn’t make a purchase.
Set Up Pixel Events:If you’ve set up specific events with Facebook Pixel (like tracking those who added items to a cart), you can create audiences based on these events.
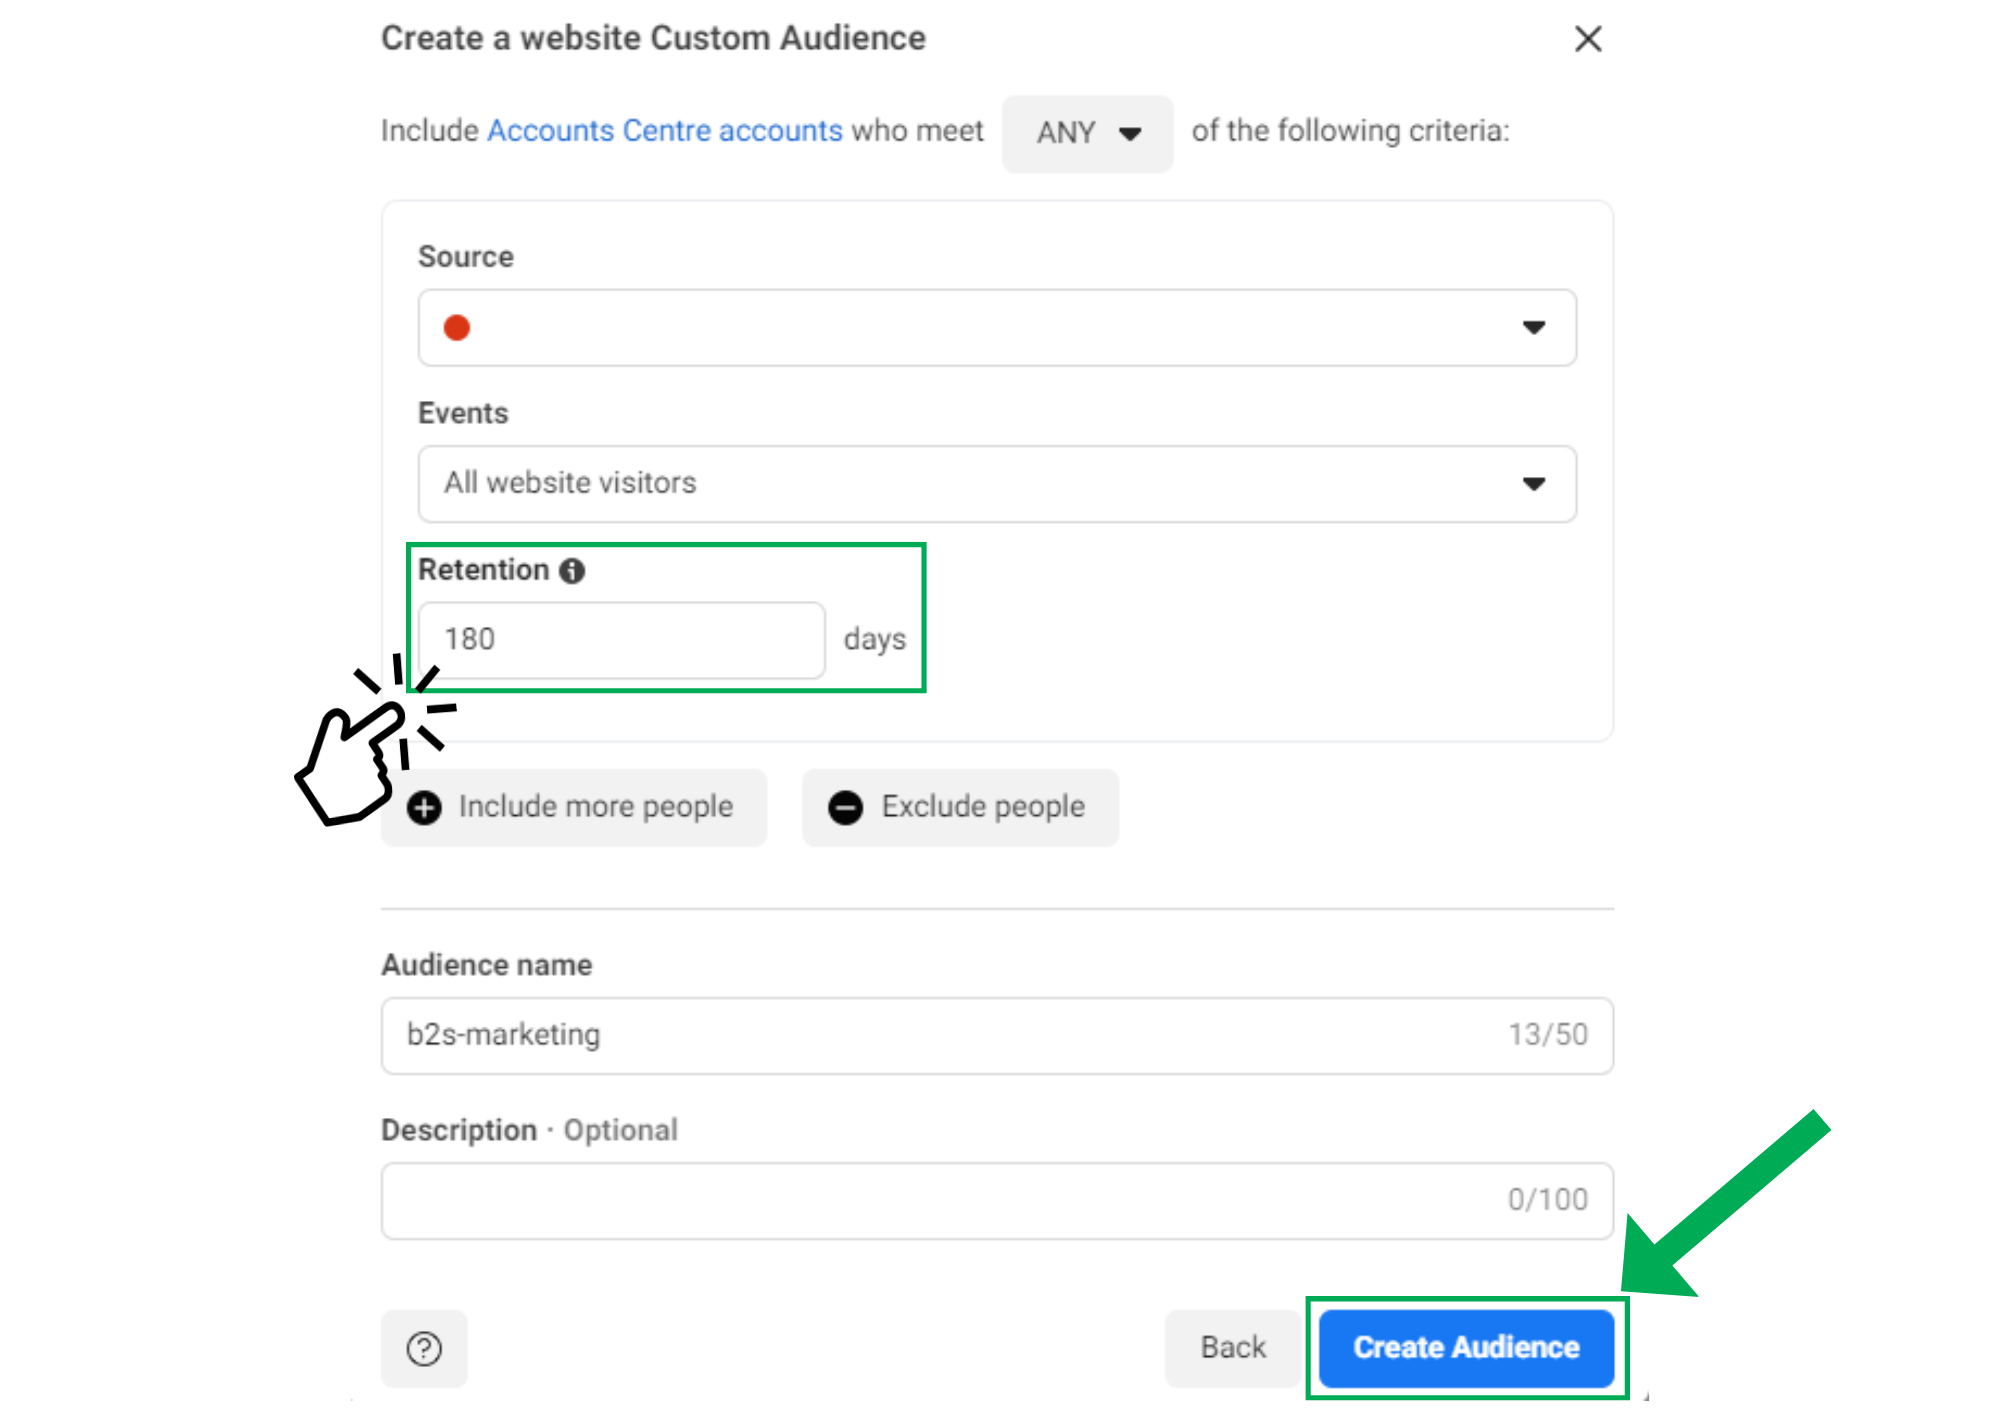
Decide how long someone will remain in your audience after visiting your website.
Choose Retention:You can choose how many days someone will stay in your audience after they visit your site, with the maximum being 180 days. This setting depends on your campaign frequency and the nature of your sales cycle.
.png)
Finally, you’ll name and save your audience.
Name Your Audience: Give your audience a name that you’ll recognize later. For instance, "30 Day Website Visitors" or "Product Page Visitors".
Create Custom Audience:Click on ‘Create Audience’. Now, your audience is set up and ready to be targeted with your campaigns.
By following these detailed steps, you set up a Facebook Custom Audience that specifically targets individuals who have interacted with your website. This targeted approach ensures that your ads are shown to users who have already expressed interest in your products or services, increasing the likelihood of conversion. Effective use of Custom Audiences can significantly enhance your ad campaigns, making them more relevant to your audience and more cost-effective for your marketing budget.